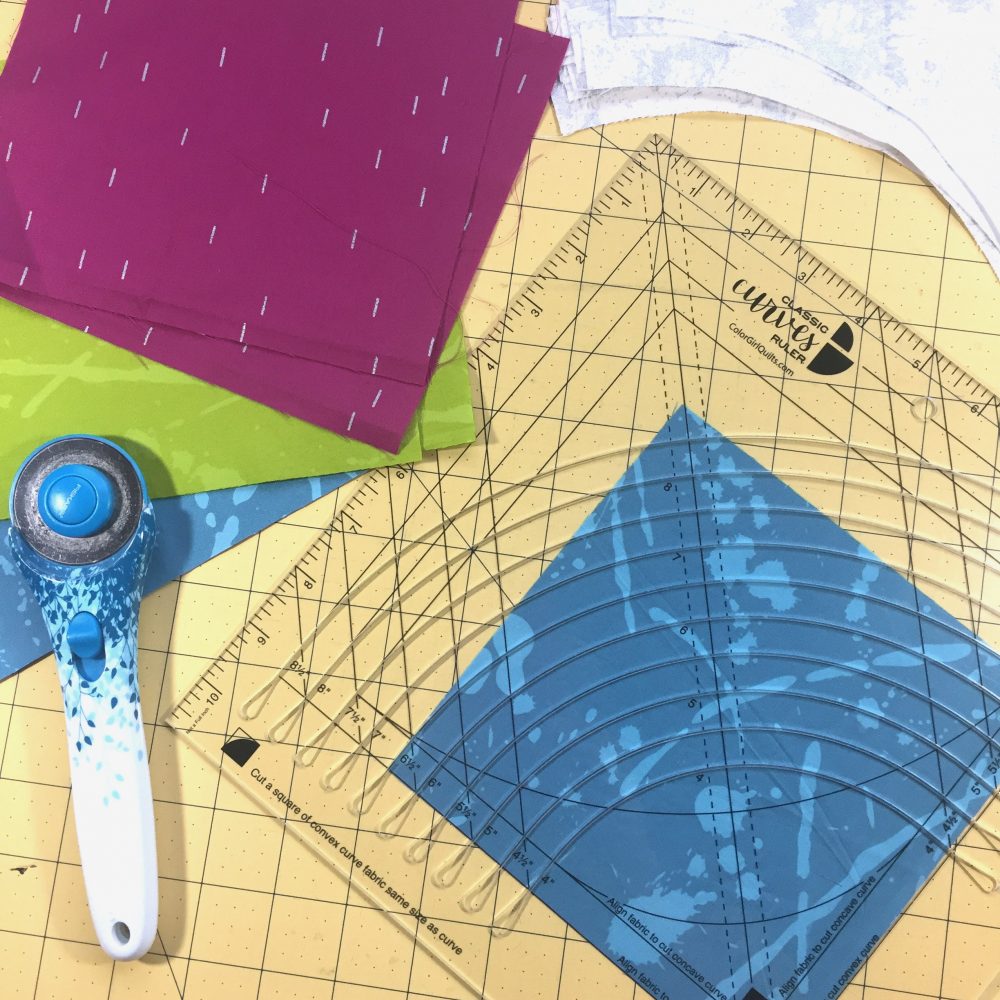
This is the first of some tutorials I want to post to go with the Classic Curves Ruler. This will give you an idea how it works and provide some up-close, photo instructions to accompany your ruler. These instructions are included with the Ruler when you purchase one, too. The CCRuler has slots that allow you to cut ten sizes of your favorite curved piecing shapes. The pieces include seam allowance, which means they sew together smoothly and blocks are nice and flat (plus, this means they fit perfectly, so they are easier to sew!).
First up, we have the basics of cutting the two parts of a drunkards’ path block.
The ruler includes ten grooves for cutting different size blocks. The measurement of the cutting groove corresponds with the unfinished size of your block (so your finished block will be 1/2″ smaller).
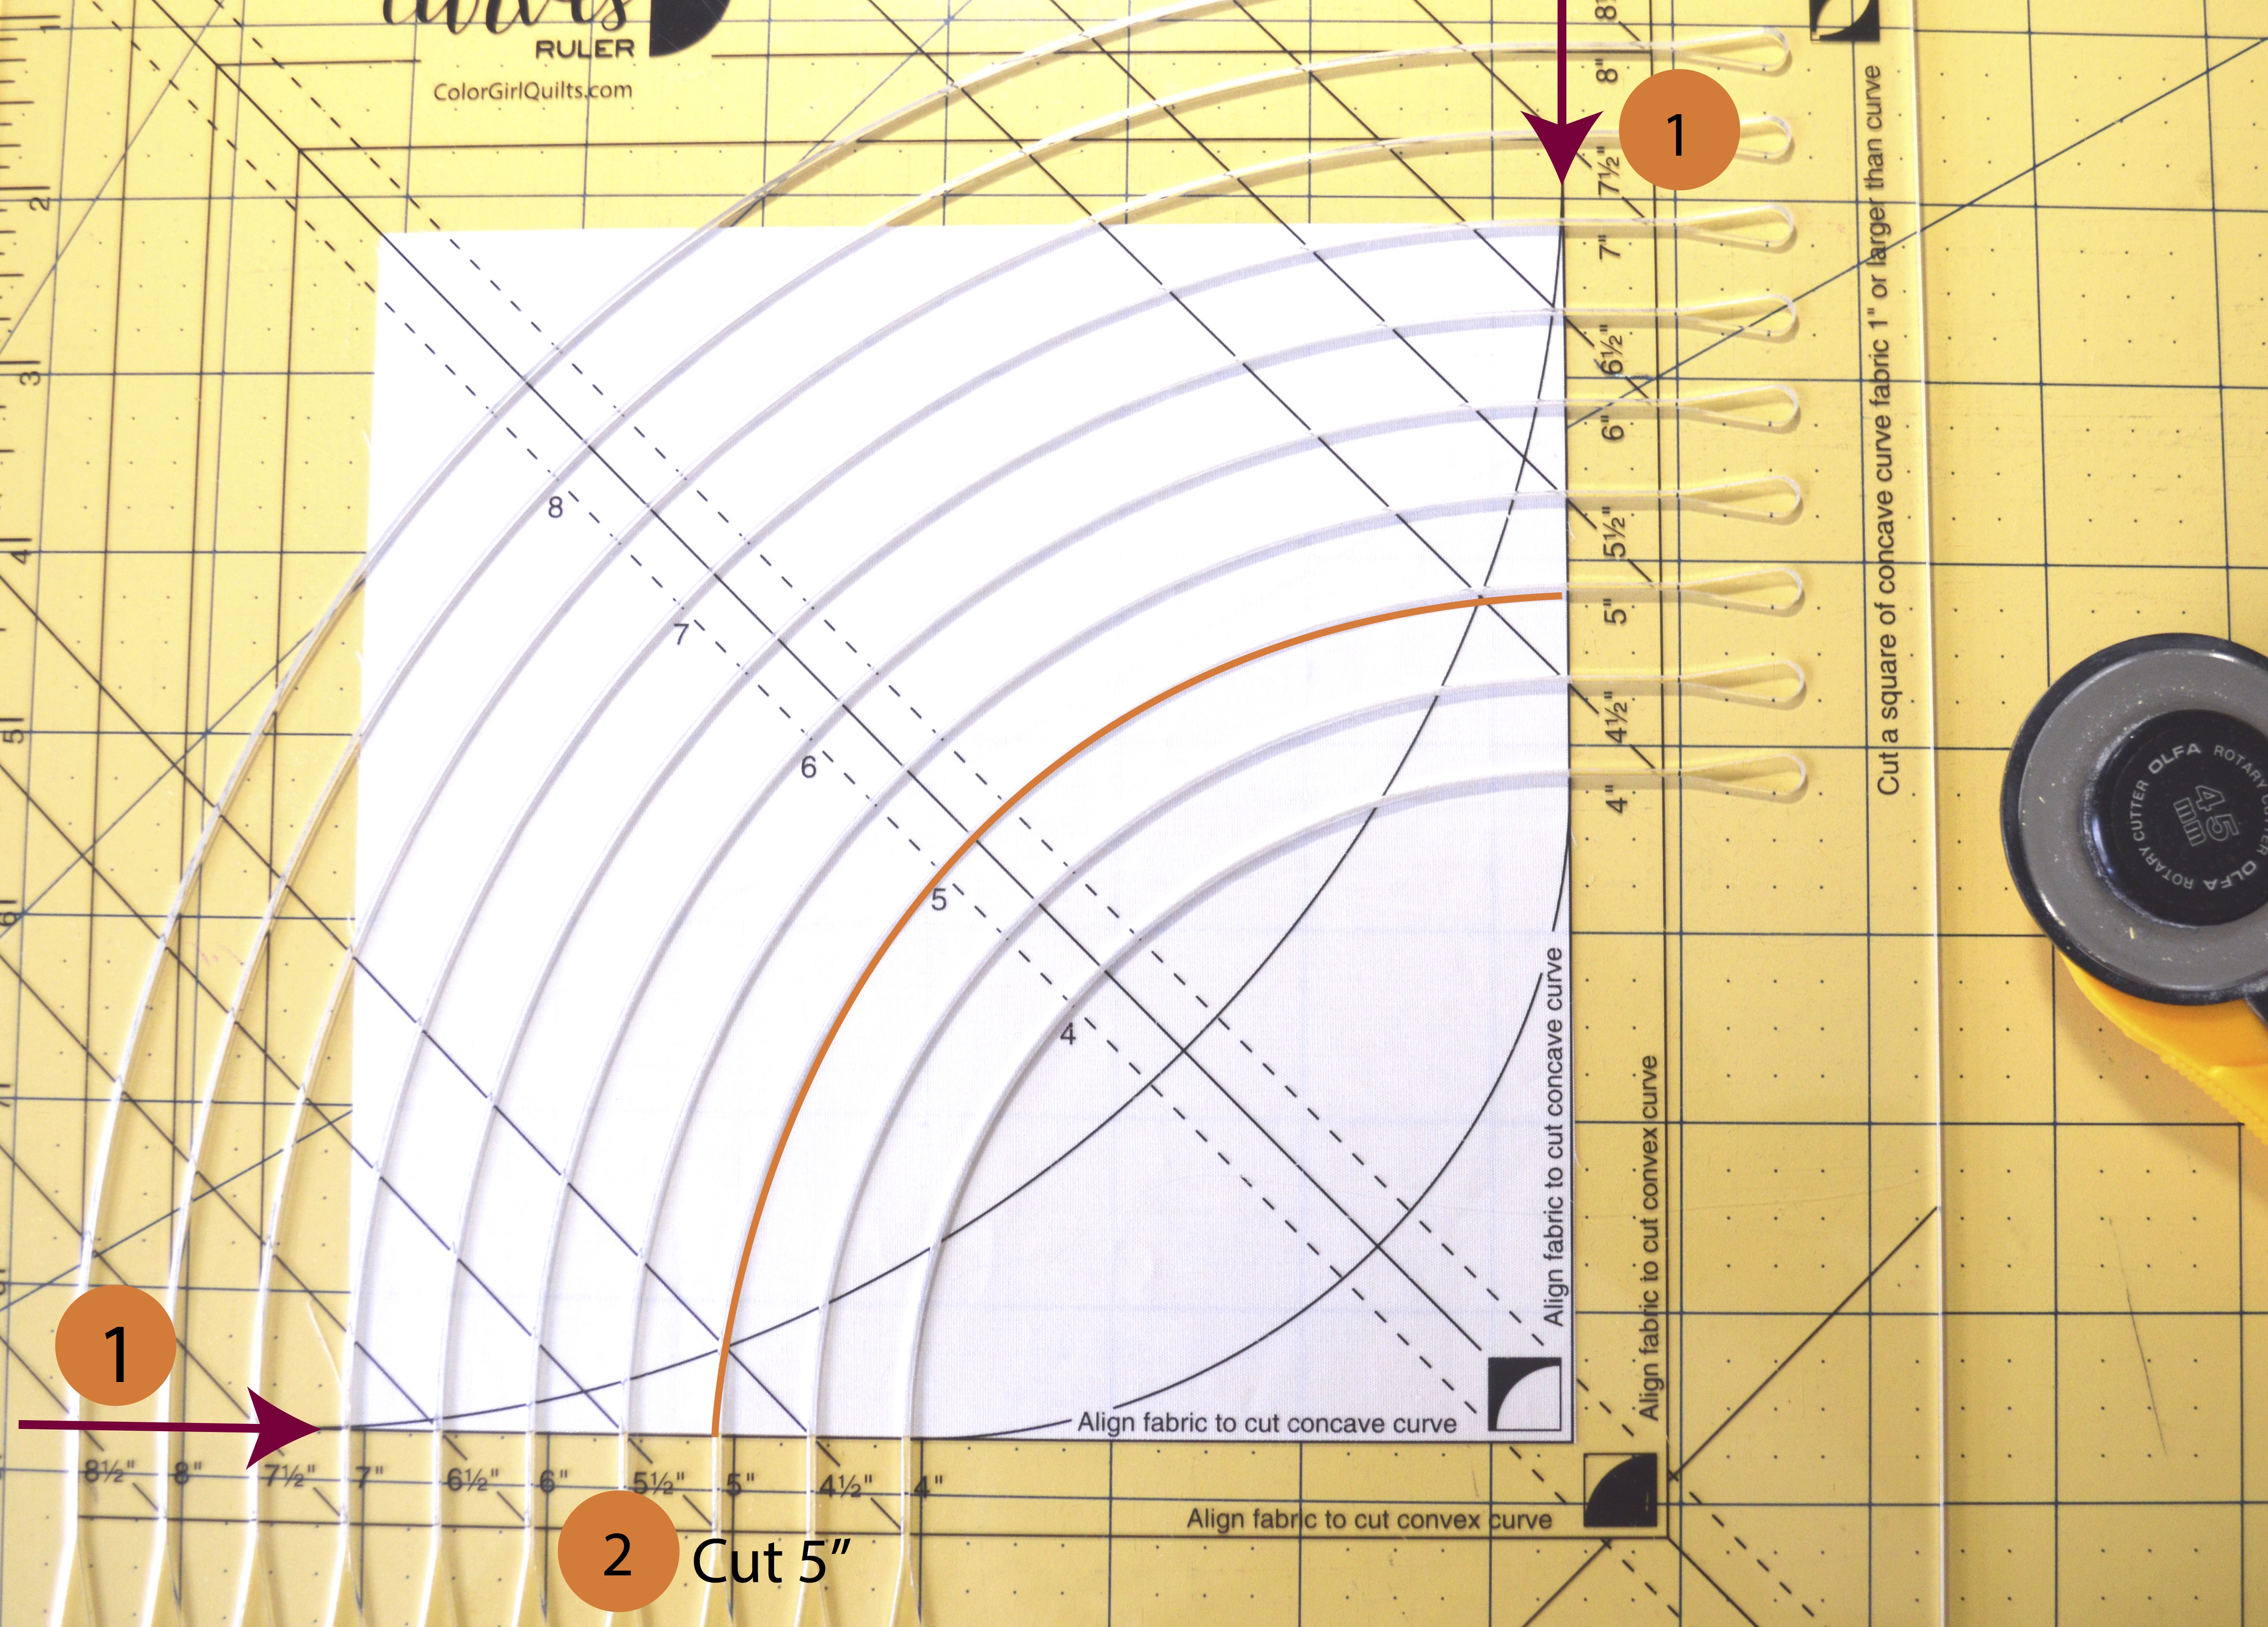
For this example, I am going to cut pieces using the 5″ groove. I am going to cut the convex curve pieces (quarter circle shape) with prints and the concave piece (corner “L” shape) with solid white. The convex curve piece starts as a square the same size as the intended cut. In this case, that is 5″.
- Align one corner of the 5″ square with the right angle lines on the ruler for cutting the Convex Curve (#1, arrows in photo below).
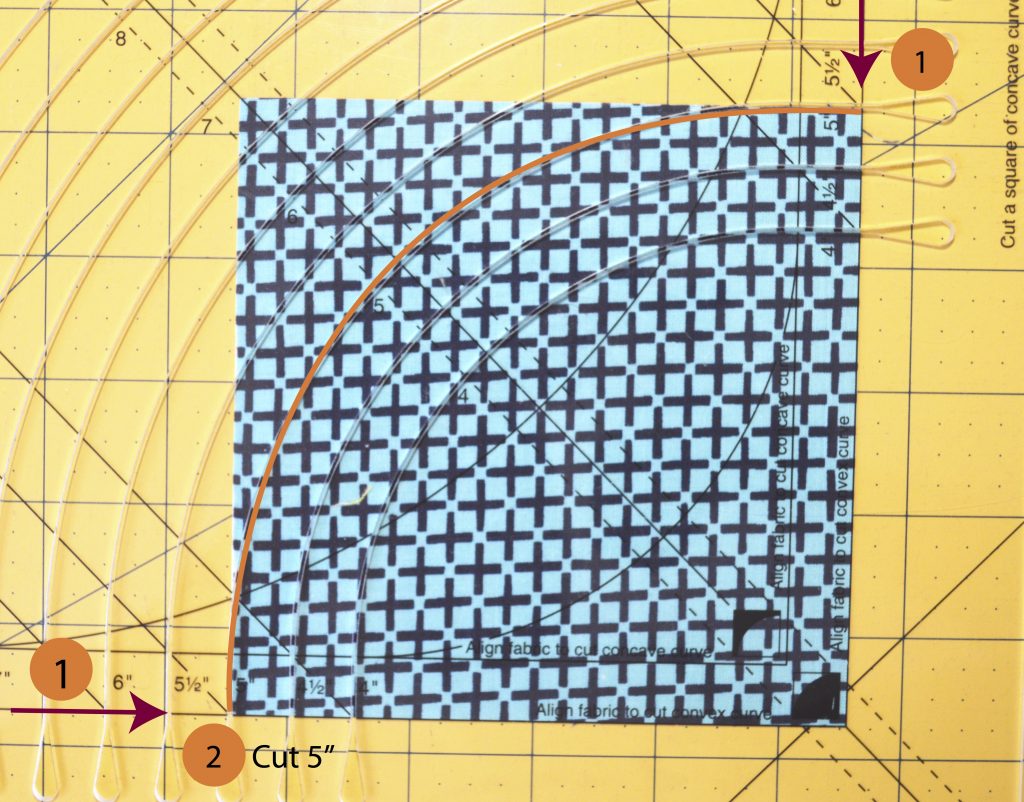 2. Cut the fabric on the curve through the groove marked 5″ (#2, orange line in photo above).

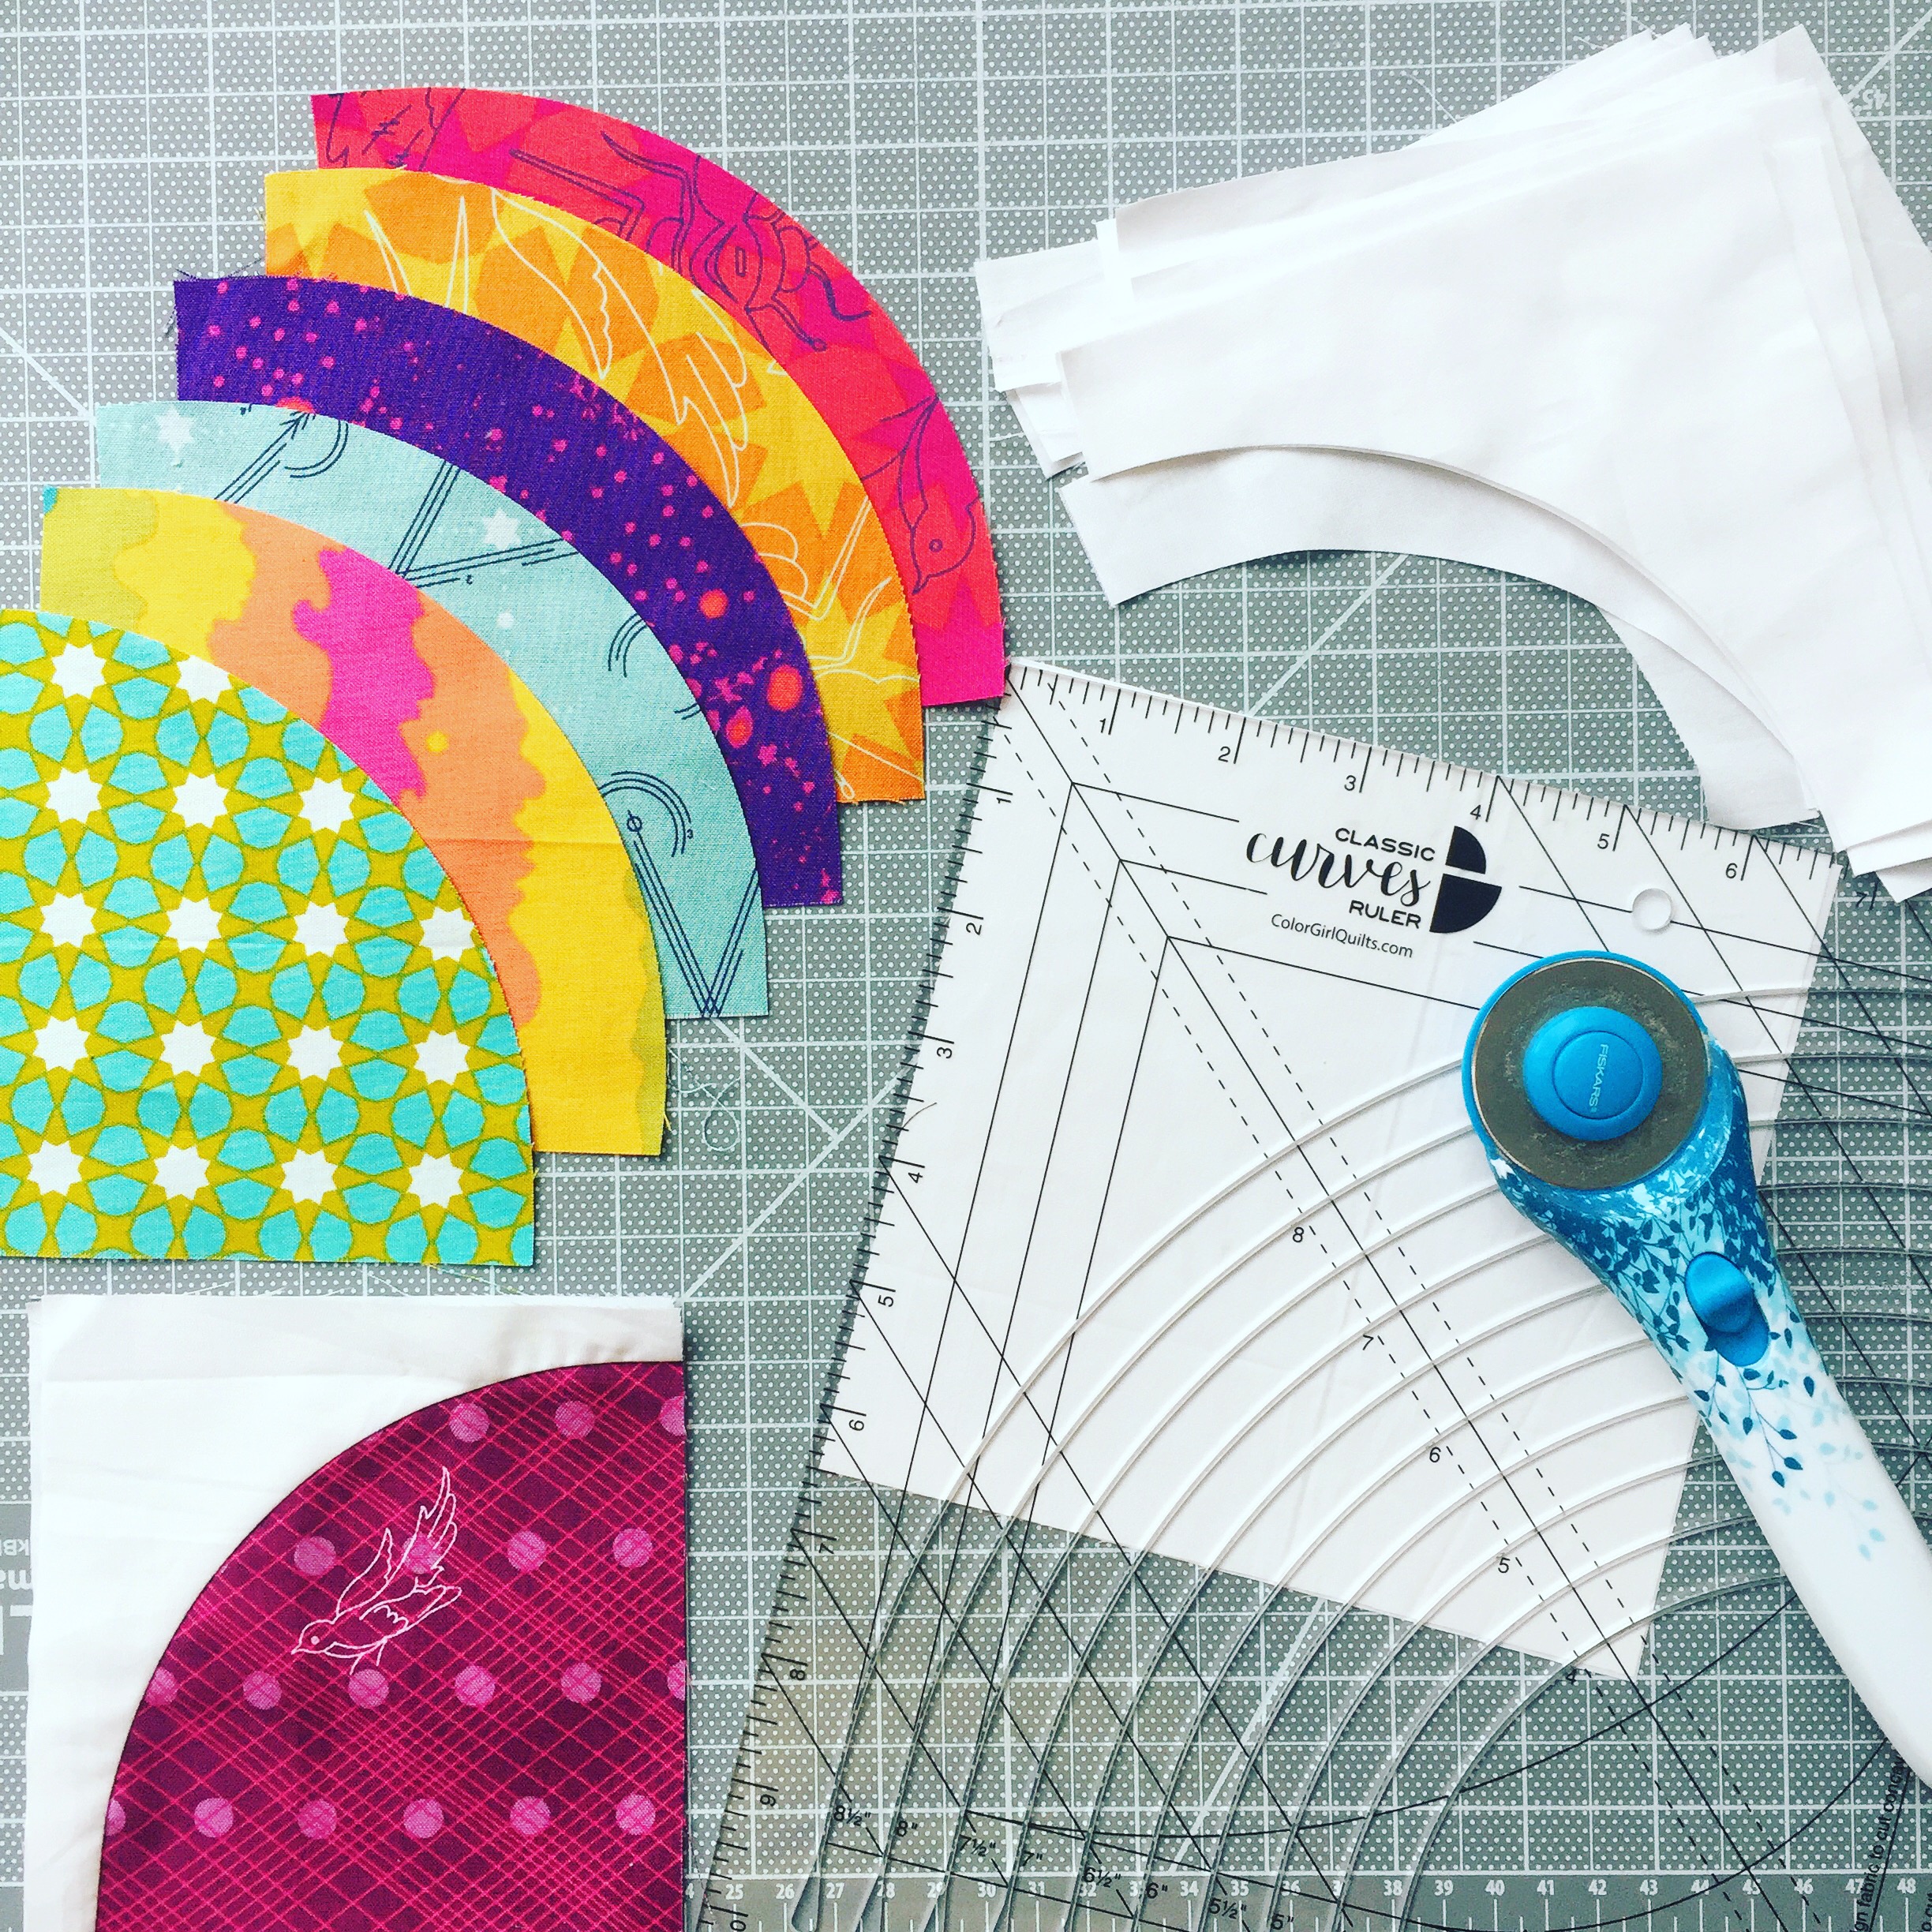
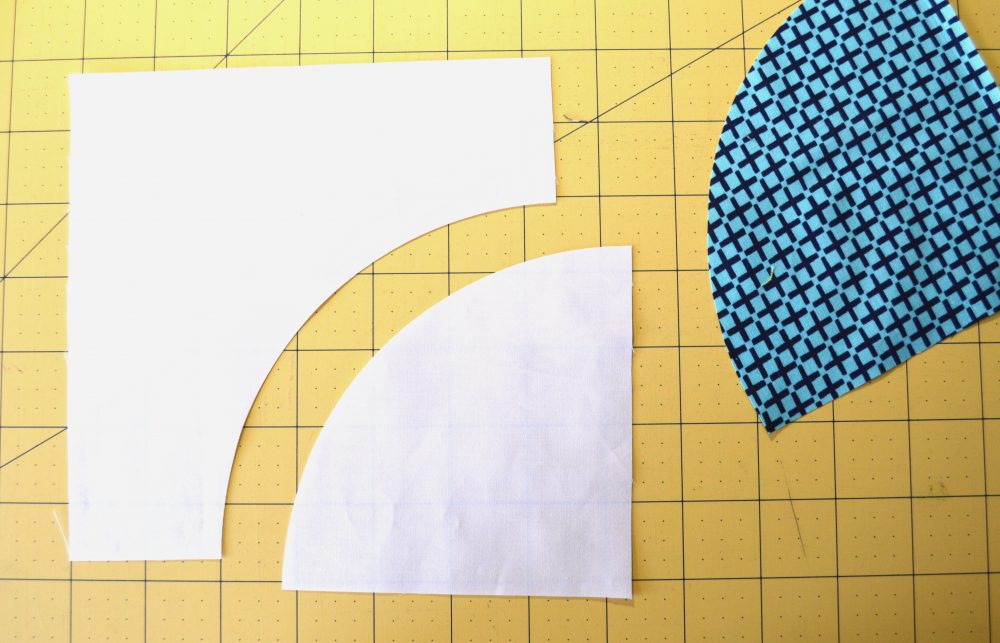
Discard the corner scrap. Set the quarter circle piece aside for later piecing. You can stack a couple squares together and cut more than one at a time.
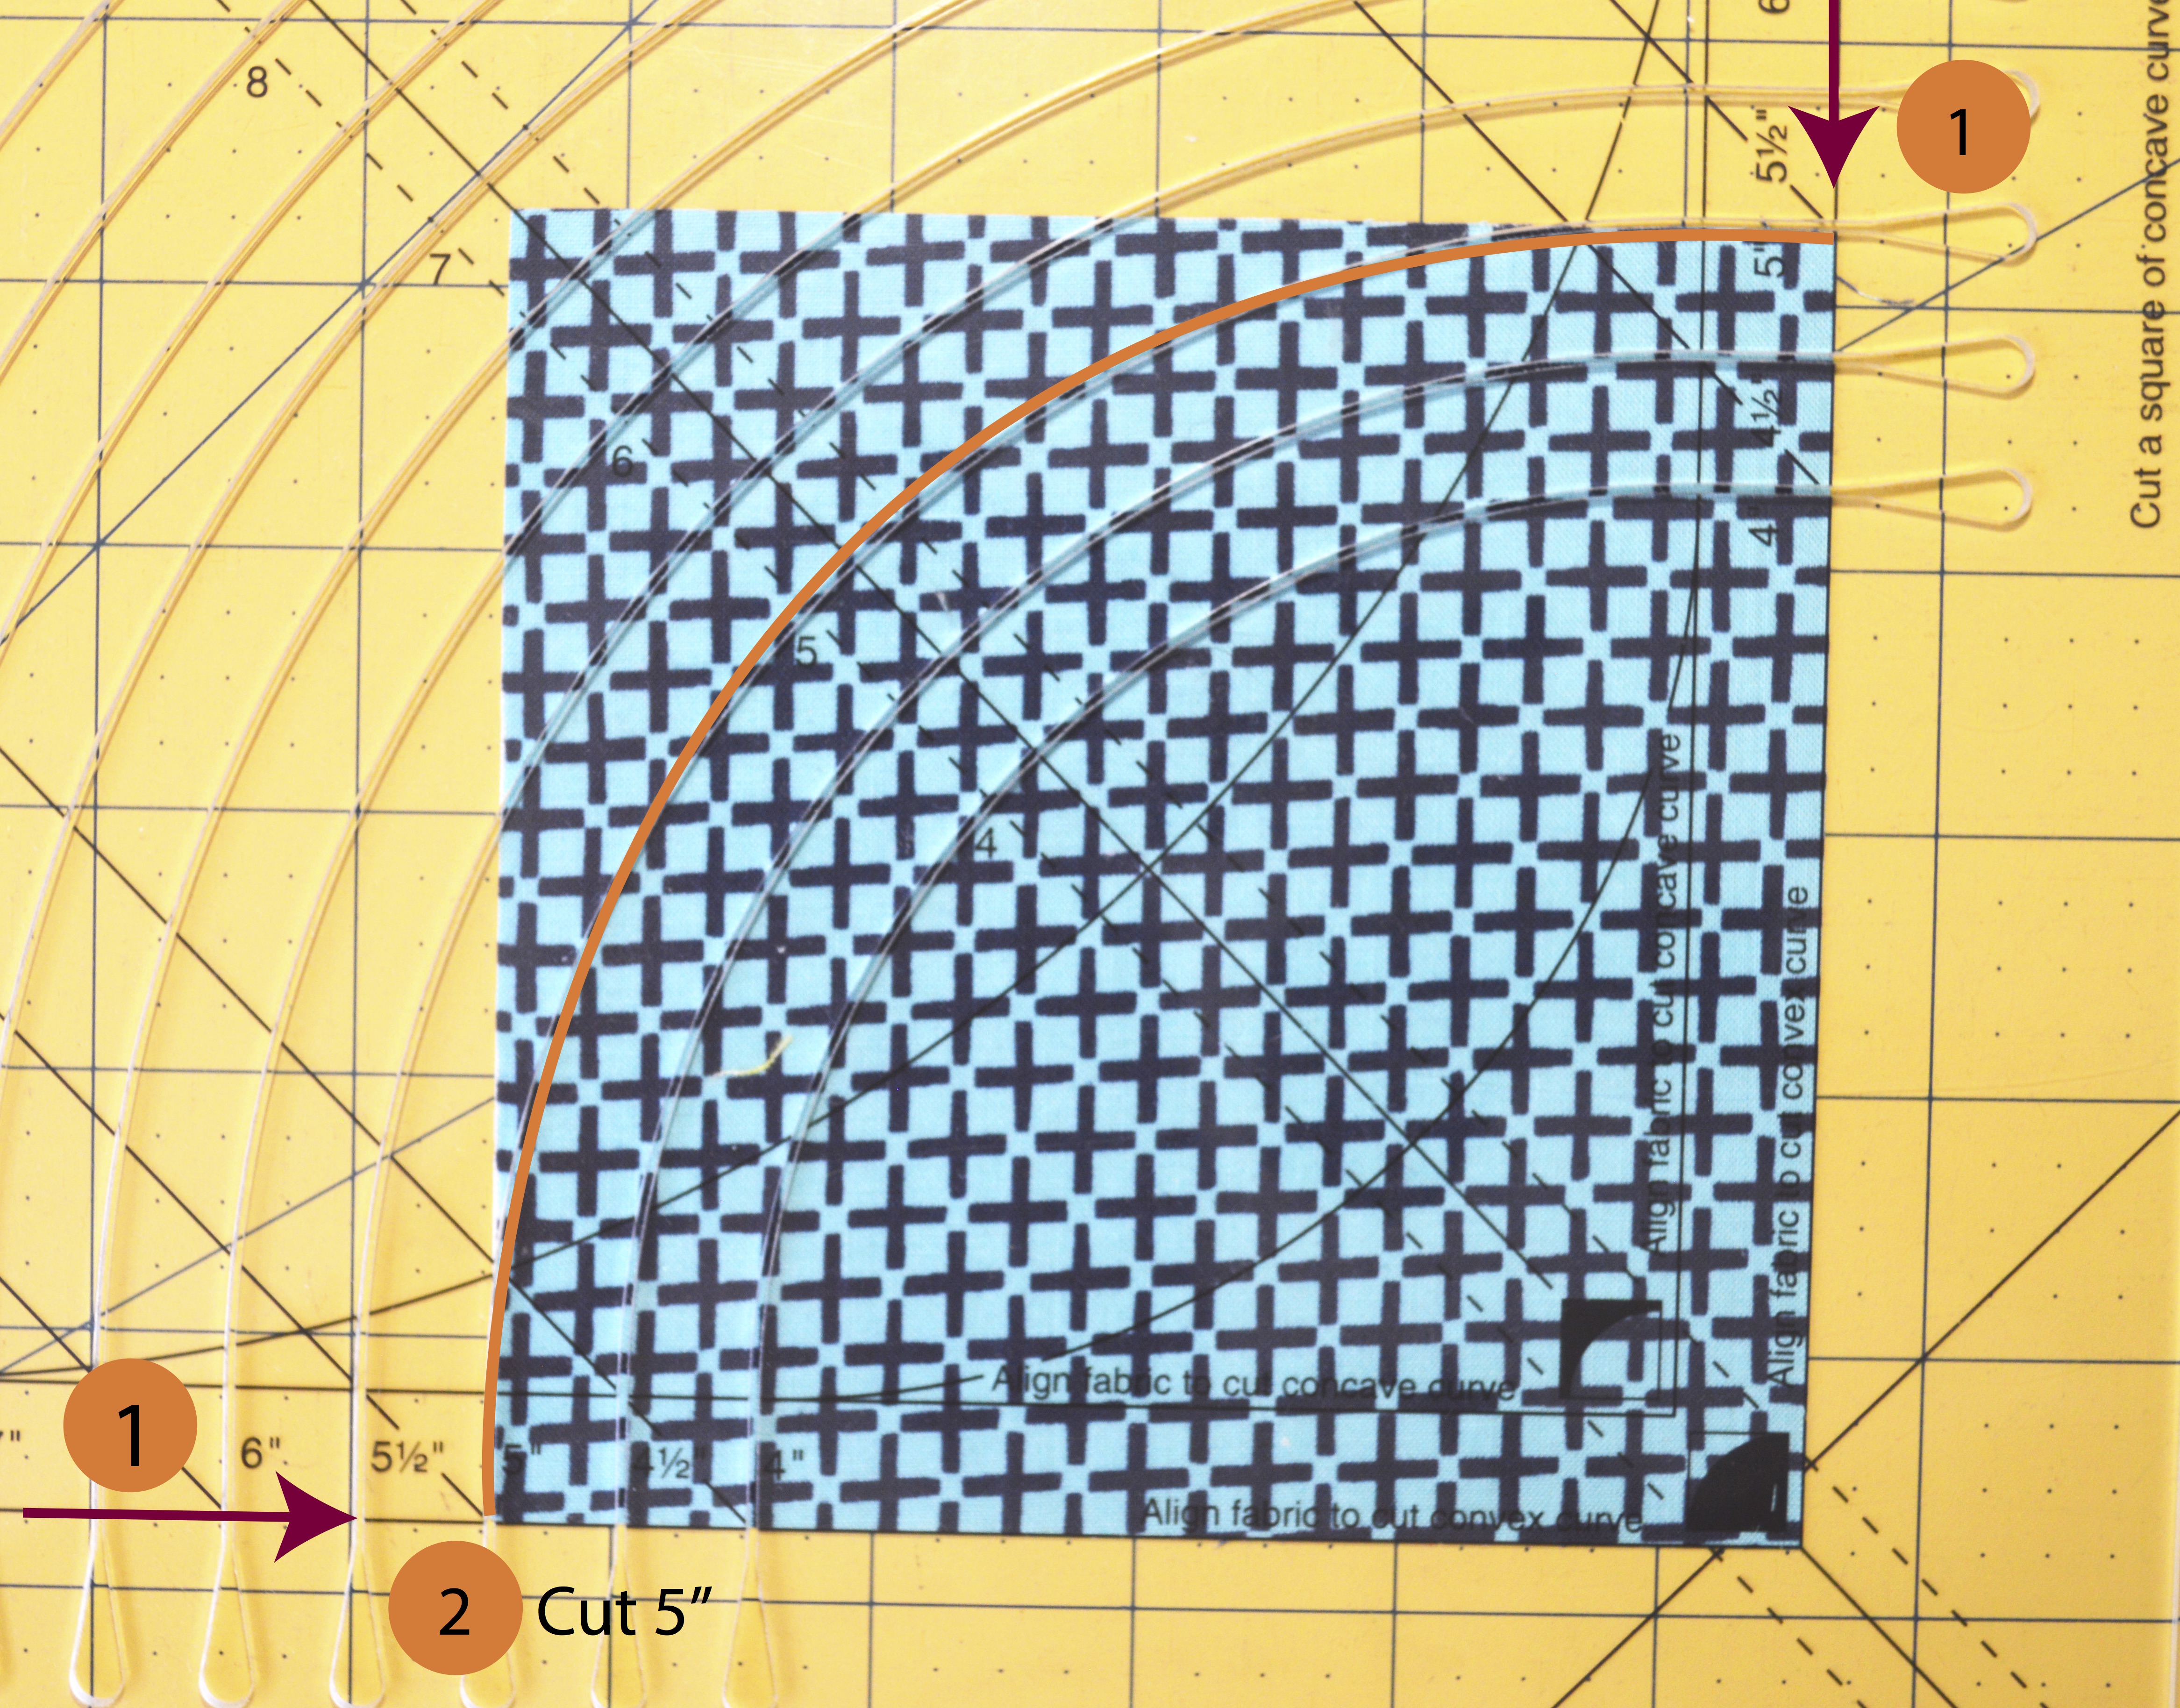
Now, cutting the concave piece. There are two ways to do this. First is cutting one at a time. For this method, start with a square of fabric at least 1″ larger than your intended cut (5″ in this case).
- Line up one corner of the fabric with the right angle lines on the ruler for cutting the concave curve (#1, arrows in photo above).
- Cut the curve through the 5″ groove of the ruler (#2, orange line in photo above). You may cut more than one at a time by stacking fabric squares.
Now, if you need a lot of the concave shapes from the same color fabric for a quilt, you can reduce your scrap/waste by cutting two from one square of fabric. Start with a square of fabric 1 1/2″ larger than intended cut. Since I am cutting 5″ blocks, I have a 6 1/2″ square of white. 1. Fold the square in half on diagonal and place ruler parallel to the straight side of the resulting triangle. Cut 1″ from the corner (see below). This results in a 1″ square cut from the corner of the larger square when you unfold the fabric.
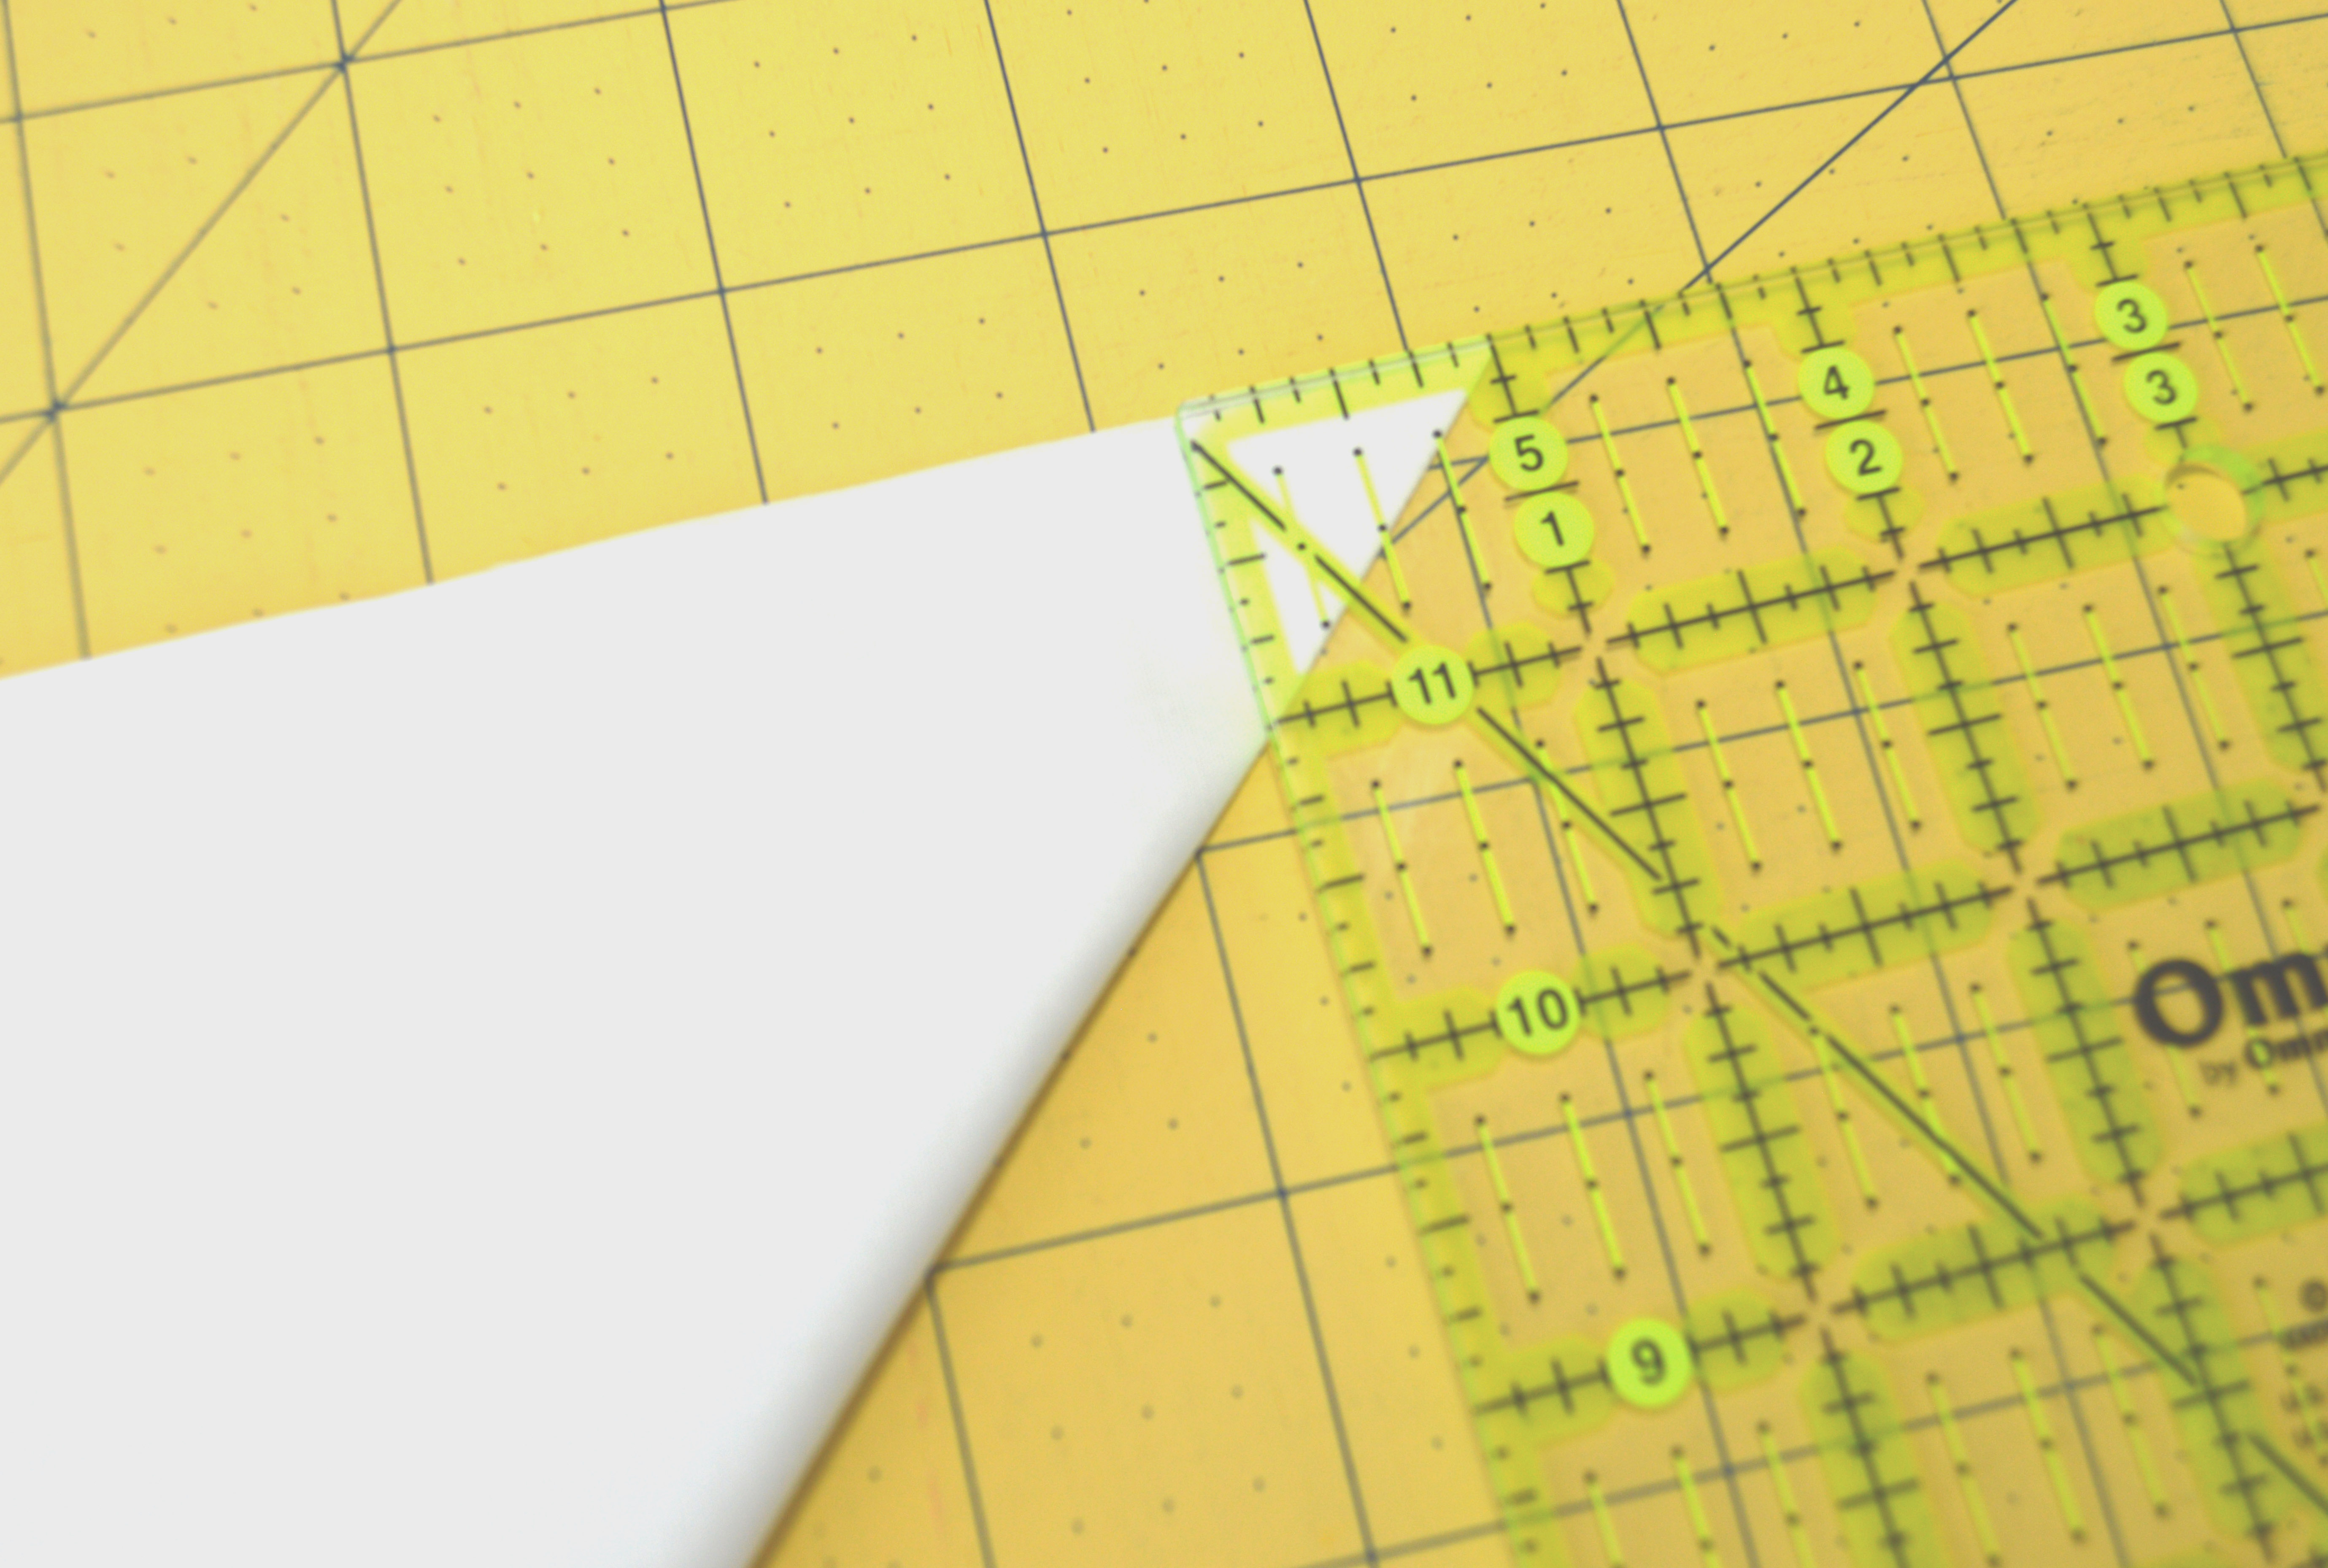
Cut a second 1″ square in the same way from the opposite corner of the square as shown below.

2. Place the Classic Curves Ruler over the cut fabric. Align the sides of the cut corners with the lines on the ruler for cutting the concave curve (#1 above). The 5″ cutting groove passes through the inside corners of both cut corner squares (#2 above).. Up close on one corner below.
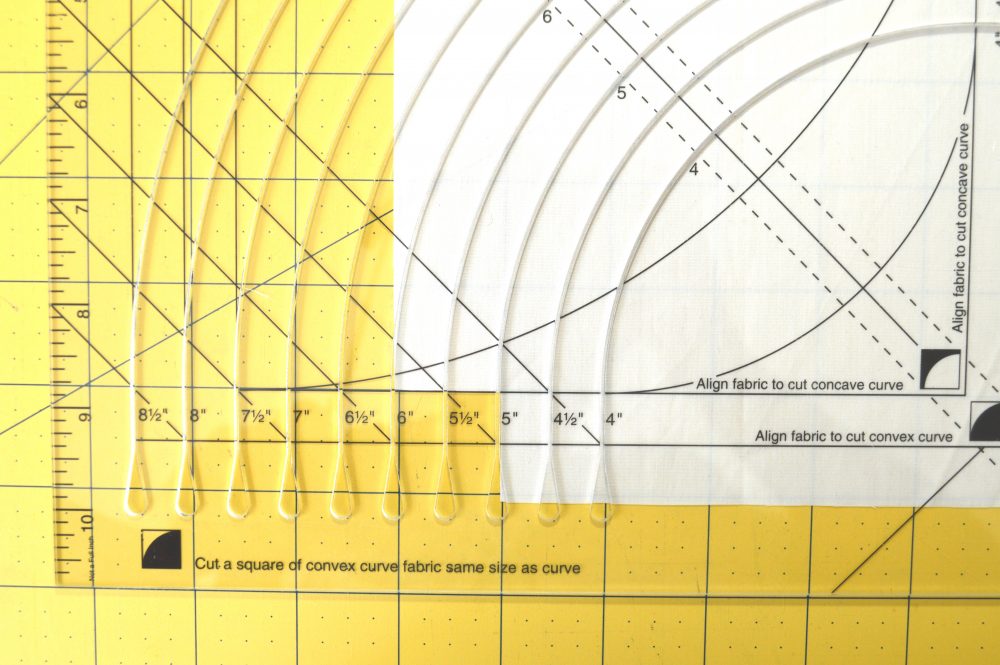
3. Cut the curve through the 5″ groove. Set the first concave corner piece (A) aside to use later for piecing.

4. Rotate the remaining piece (B) to cut again. Place the CCR in the same position on this piece as it was for step 2. The cut corners line up with the lines for cutting the concave curve (#1 above) and the 5″ cutting groove passes through what was previously the corner of the cut squares (#2 above).
5. Cut the curve through the 5″ groove. This gives you a second concave corner piece. You can cut more than one using this method if you stack a few squares together. This can make cutting for your quilt extremely quick!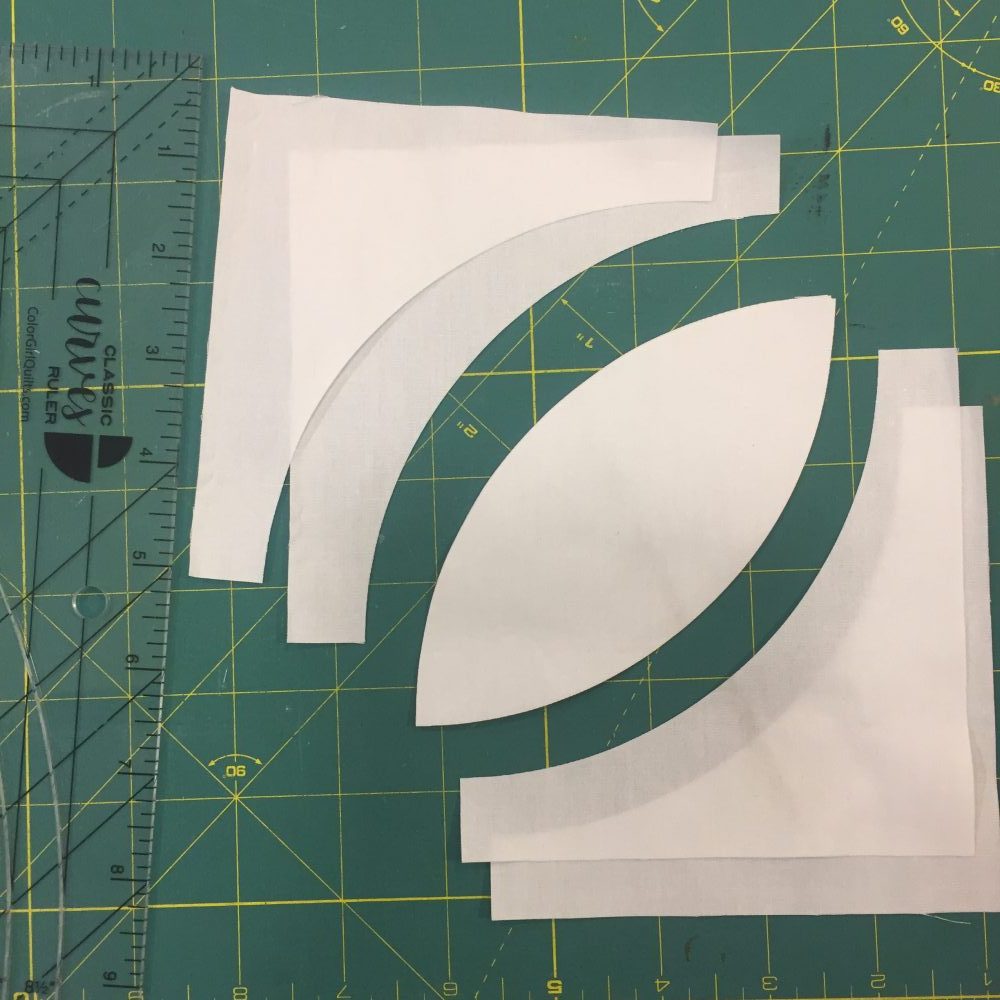
I hope this was good information! Sometimes it makes more sense to see the steps up close in photos rather than graphics on a pattern. It has been so much fun to see people on social media posting about using their new Classic Curves Rulers! Keep it up.
I’m working on new patterns, too. The CCR comes with a pattern to make a fun, modern drunkards’ path quilt using the steps above. A great project to get you started with curves. Other patterns that use the Classic Curves Ruler are available in my shophttps://colorgirlquiltsblog.com/shop, look for the Classic Curves Ruler icon on the pattern covers.
Up next, I will show you how I trim and square my blocks. That’s usually a step people find tricky…I’ve got you covered!
-Sharon
Get special offers and news right in your inbox! Be sure and sign up for my mailing list.


I have your ruler and this is exactly what I’ve been waiting for! Thank you!
Quick question – if I follow the steps for cutting the two convex shapes at the same time, will the center Orange peel shape (waste if making DP blocks) be the one I need for piecing an orange peel block? (I know I would want the peel in a different fabric, but will the cutting technique work? Thanks so much,
@susansquiltstudio
Is this rule large enough to use on your Polka Dot Bikini pattern?
Hi, I would really like to know if out of a charm square could I get 2 usable pieces of fabric. So say if I had a patterned pack and a solids pack how could I cut it so that I can just trim down the concave piece from each square and make alternating blocks?
Thanks
I just purchased your ruler and watched two of your tutorials (drunkards path and orange slice). In the tutorials you instructed that we cut off either 1” or 3/4” off of the folded corners. This may seem obvious to your more experienced students/ clients but nothing was ever explained to know how much to trim off for the various sizes. Can you explain how much to trim for each size?