
I am so excited at how quickly this quilt is coming together! who knew that having the blocks already sewn would be such a headstart?! ( -;
This series of posts features instructions to turn your orphan sampler quilt blocks into a finished quilt. I’ll show you how to create this unique setting design for a stunning finished quilt. Find all the posts in this series, <<here>>
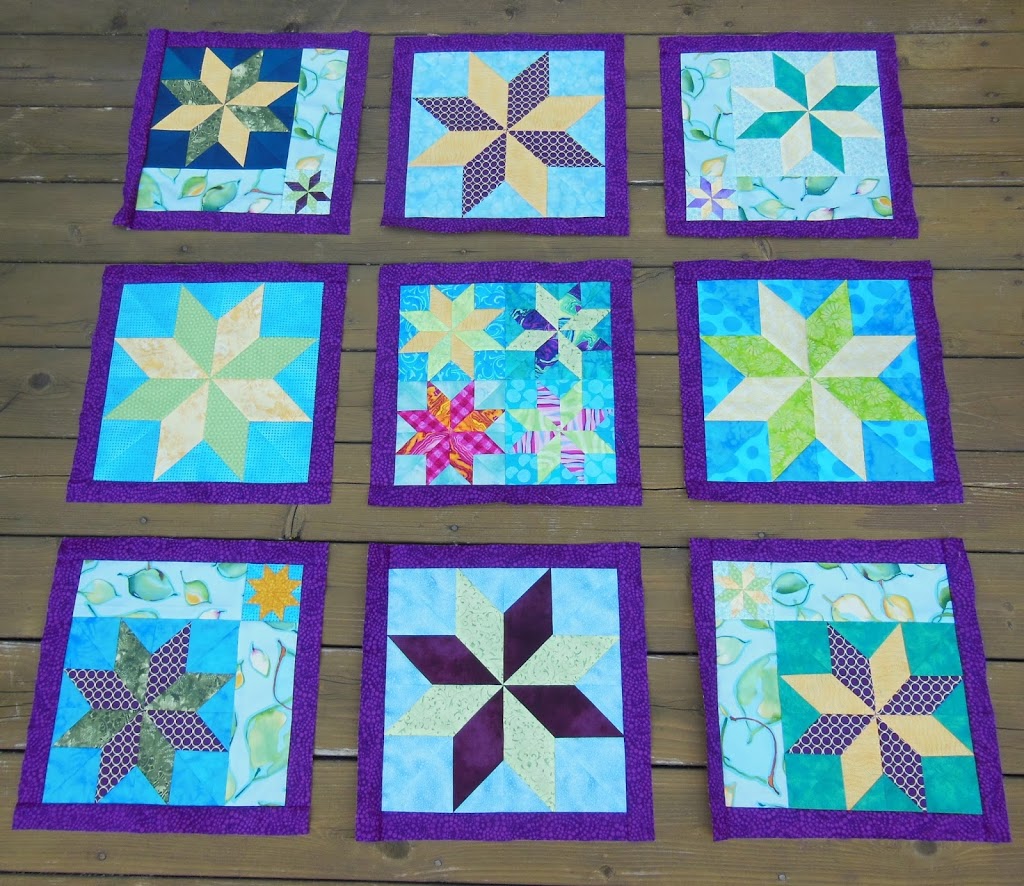
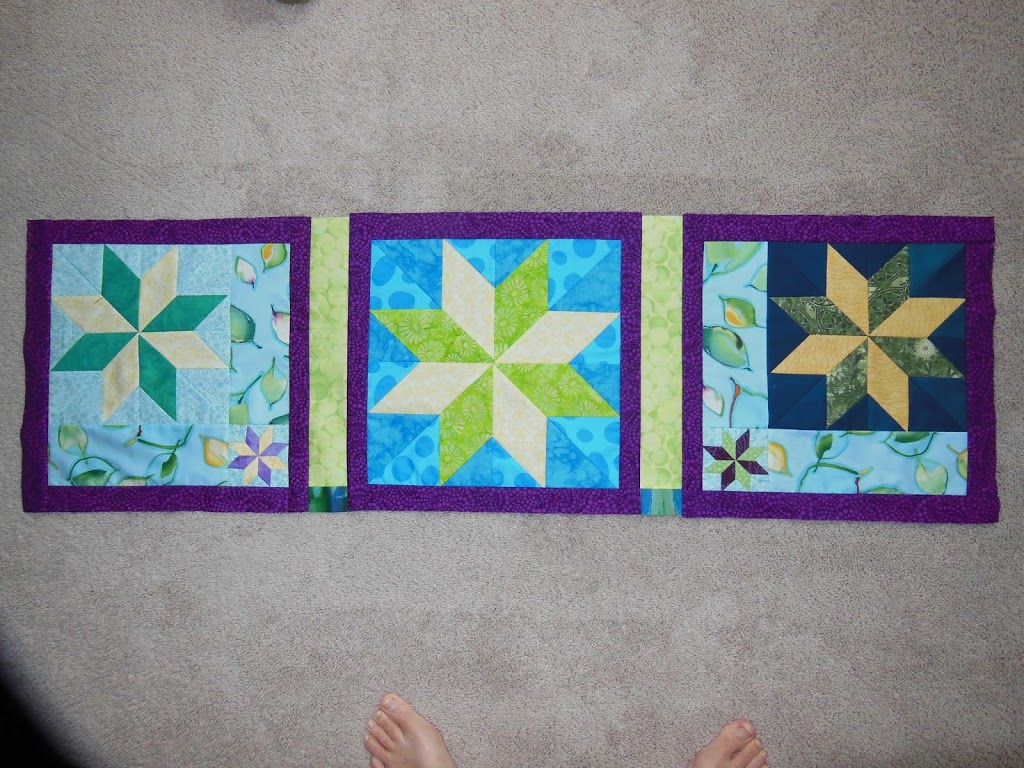
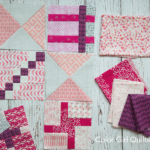
In the first step (find it <here>), we cut sashing strips from three different fabrics and sewed the A sashing strips to the four edges of the blocks, framing them, like this:
Next, we will sew up the sashing B and C strips to create the center of our quilt.
in the first step, you cut 6 strips of sashing B each 1 1/2″ by the width of fabric. From those strips, cut sixteen short strips 2 1/2″ x 1 1/2″. Set the remaining B strips aside for now.
From Sashing fabric C you have 10 strips 2 1/2″ by width of fabric. From these strips cut 8 strips *13 1/2″ x 2 1/2″; plus 4 strips *12 1/2″ x 2 1/2″
*these measurements are for sampler blocks that are 12″ finished. Adjust according to your block size. For example, if your blocks will finish 9″ cut 8 strips 10 1/2″ and 4 strips 9 1/2″
Cut 4 squares from cornerstone fabric 2 1/2″x 2 1/2″
SEW!
Sew one 2 1/2″ B strip to one end of each of the eight *13 1/2″ C strips like this:
Press toward the green (larger) strip
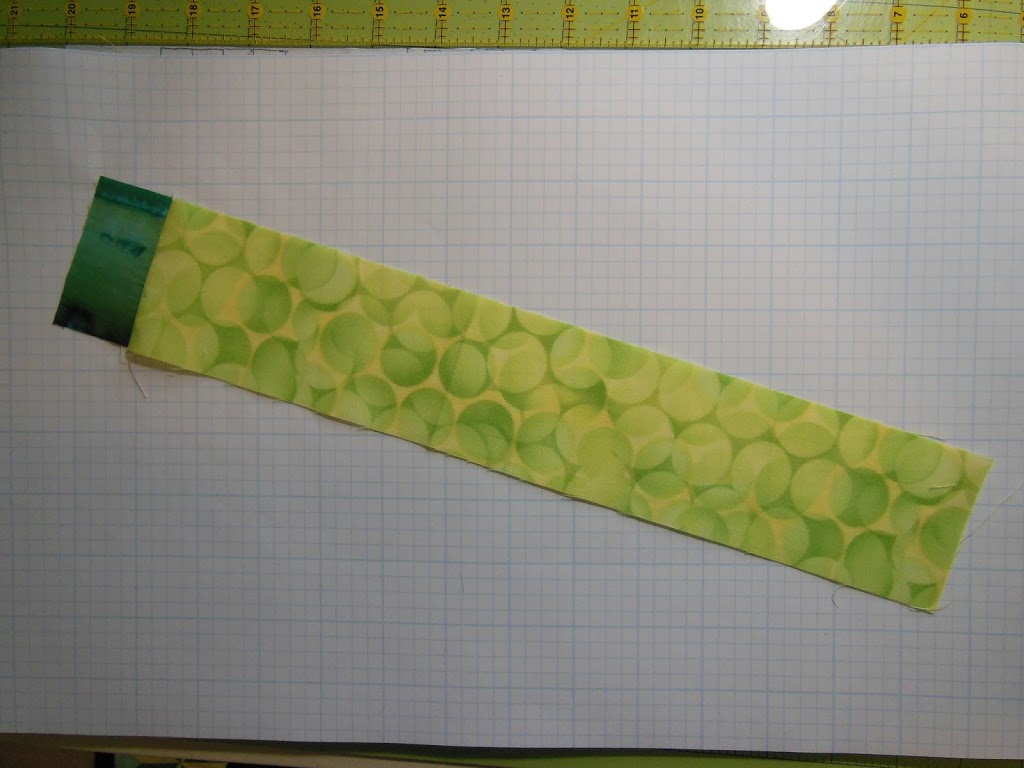 |
| Make 8: B strip plus C strip |
Sew one 2 1/2″ B strip to BOTH ends of the four *12 1/2″ C strips like this:
press toward the green (larger) strip
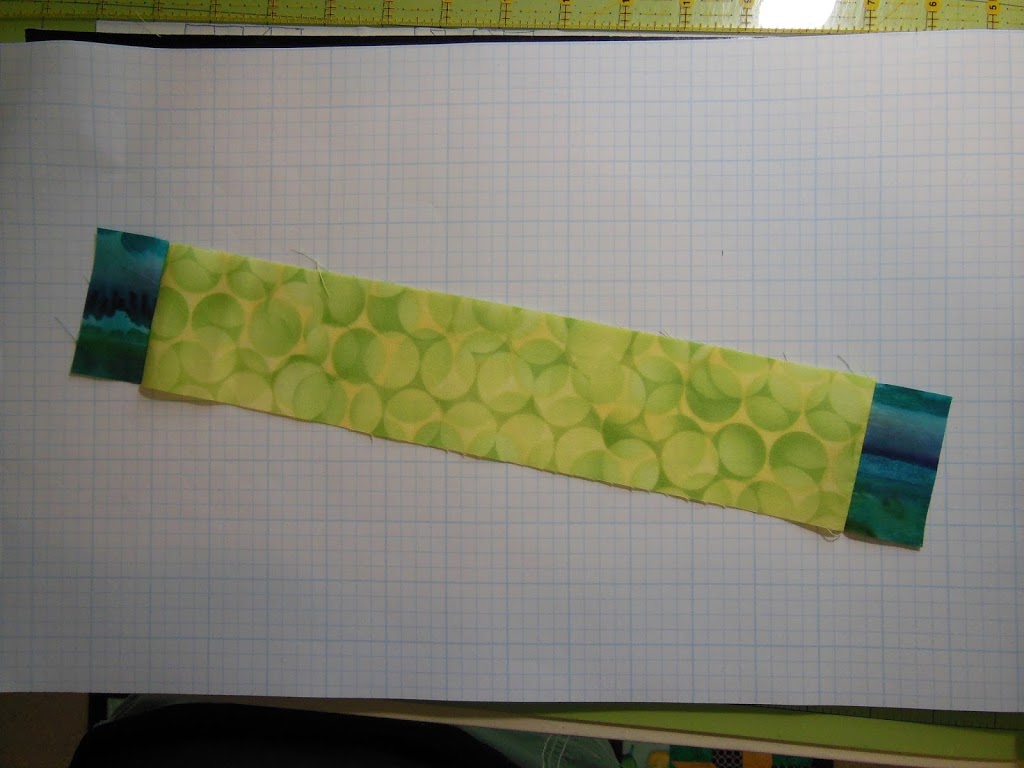 |
| Make 4: 2 B strips plus 1 C strip |
Next, you will combine the sashing strips created above with the corner stone squares to create longer sashings to sew between blocks. Press away from the corner squares (toward the B sashings)
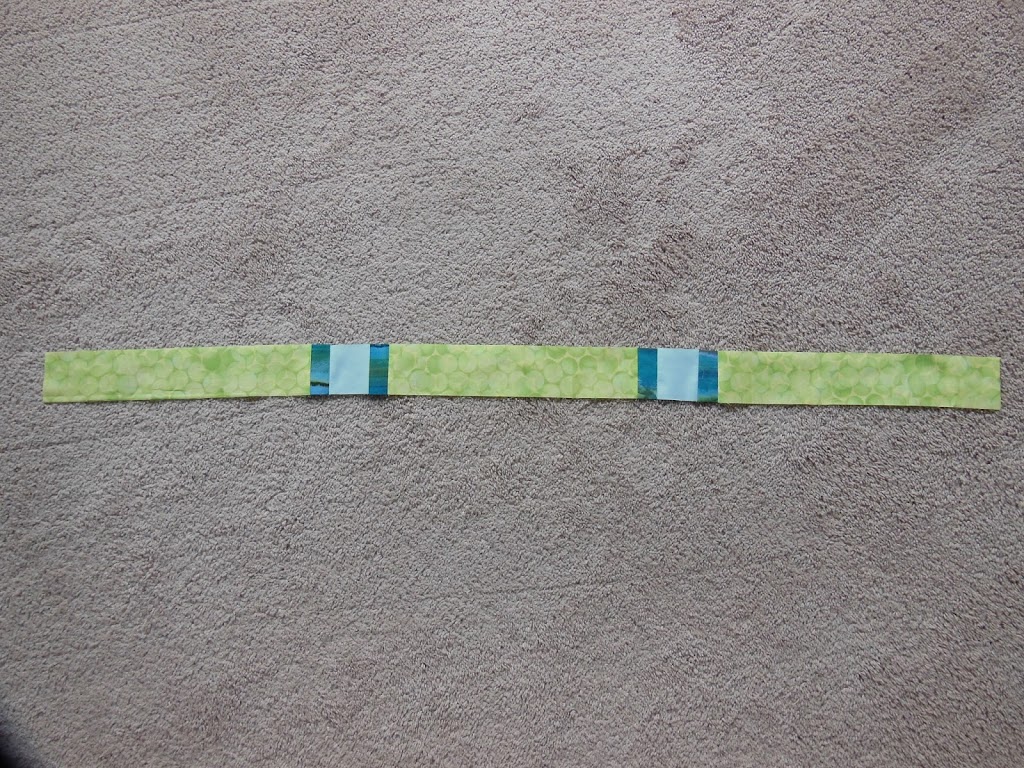 |
| Make 2 |
Next, sew two of the longer sashing strips created above (the *13 1/2″ plus one B strip) between three of the sampler blocks like this:
(huge apology for the bad photos)
press toward the green sashing (away from the blocks/purple sashing strips)
 |
| Make 2 |
Then sew the final two shorter sashings (the *12 1/2″ plus two B strips) between the final three sampler blocks like this:
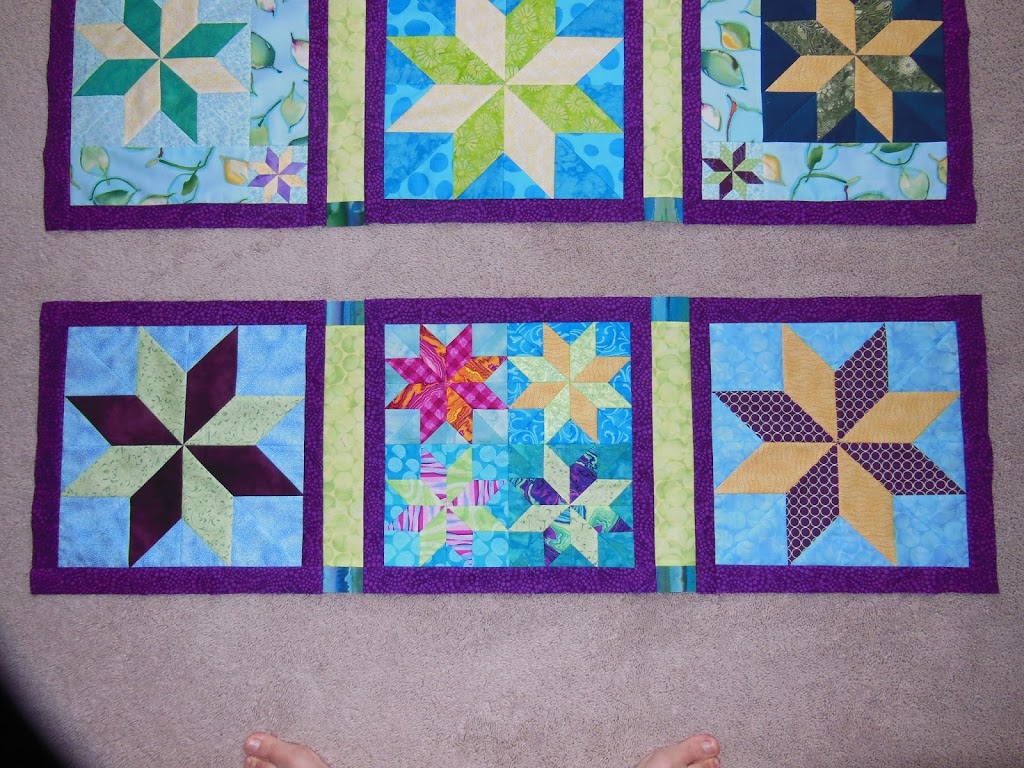 |
| Make 1 (center row of blocks) |
This makes three rows of three blocks with sashings between them, plus two long sashing strips that include the corner stones. Lay the pieces out to form the full quilt center
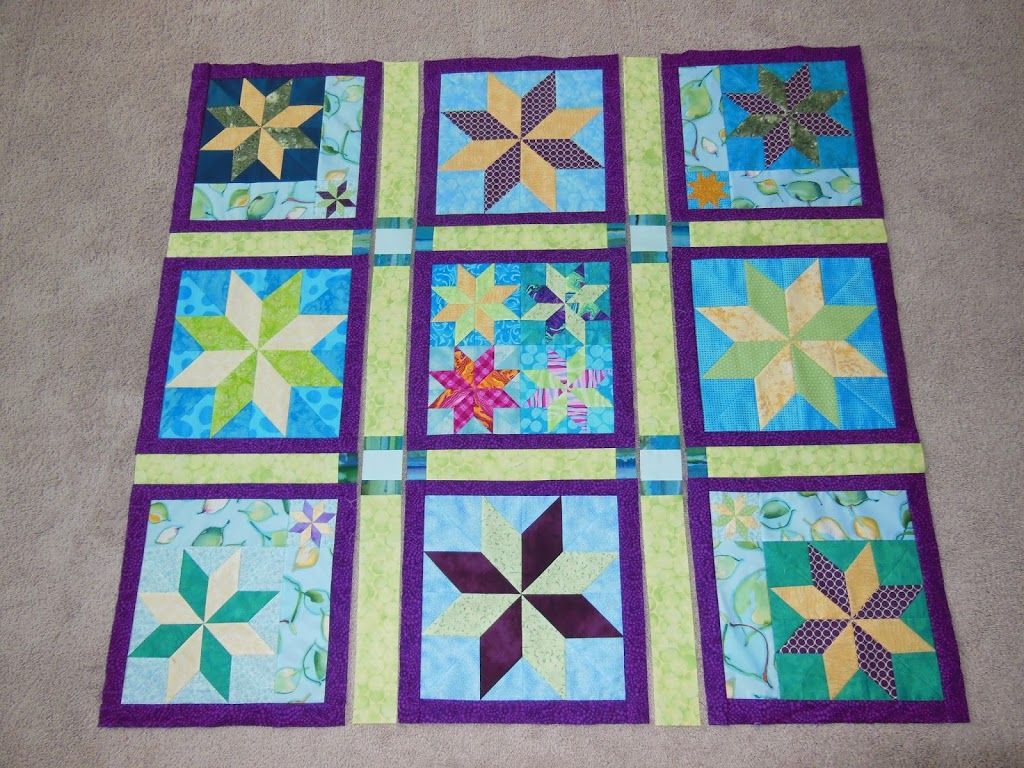
Sew it all together!
isn’t it pretty?
 |
| just before sewing them all together… |
Next we sew the remaining strips of Sashing C (the green) to all four sides to frame the entire square.
Measure the first width of the quilt and piece/trim your sashing C strips to the correct length,
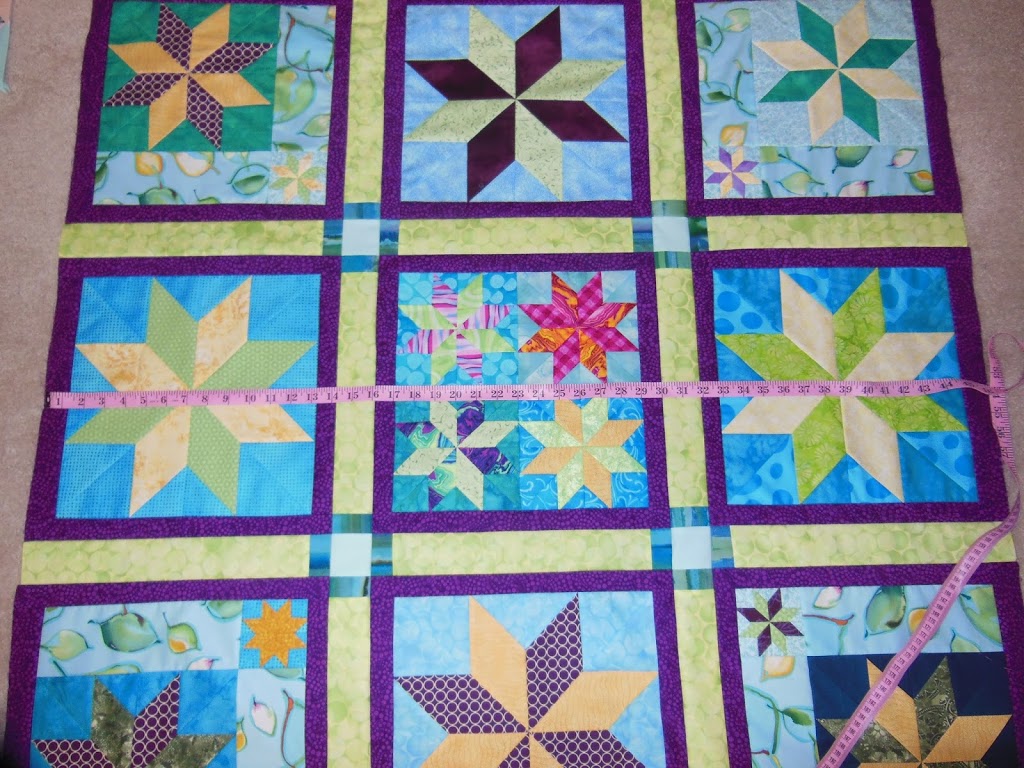 |
Sew the two strips of this length to opposite sides of the quilt.
Measure in the same way to determine the length of the remaining two opposite sides and sew them on.

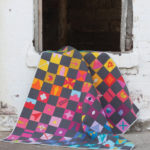
Here is mine so far. Finally had a day dry enough to take an outdoor picture! yippee.
And…cut!
next scene is the two borders, then finished.
<<click here>> for next step
Sharon
click here to sign up for Color Girl email. Get free patterns, tutorials and shop updates straight to your inbox.


How very pretty this is.
That is beautiful!
It is gorgeous! Hoping it is sunny for your party today.