Rachel asked in a comment on the last post about drafting a pattern to foundation paper, like I did with my Marcelle Medallion star block. So, I thought I would show a bit of how I did it.
Any block pattern can be converted to a paper foundation pattern to make it easier to piece and/or improve accuracy with points or very small pieces. I did the Marcelle this way because the original pattern is made up of templates meant to be traced and cut out of fabric (rather than rotary cut pieces) and also contains Y seams, which seemed unnecessary in this block (to me).
**Incidentally, these are the same reasons my mom decided to hand piece her star…also a good alternative to foundation piecing.
Start by dividing the block into the largest possible segments that still allow you to piece in a 1, 2, 3 order as in foundation piecing.
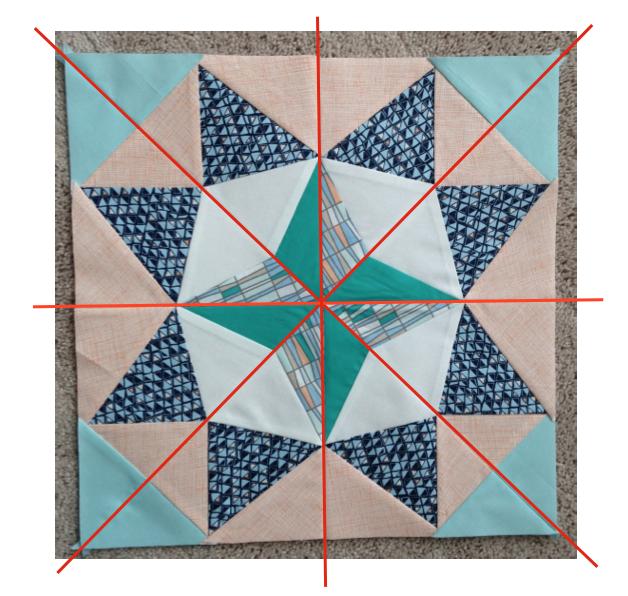
This is how I divided this block. I pieced the eight components (four triangles with mirror images).
Since this is a copyrighted pattern, I will not share my actual pattern or measurements, but it is easy to draw out on graph paper if you have the measurements.
For an idea, here are foundations I drafted for a Lemoyne Star block,
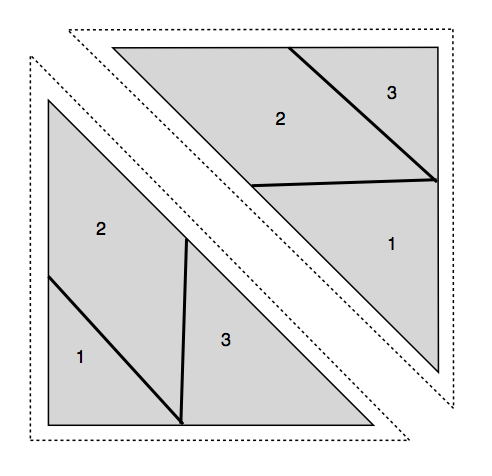
These blocks are mirror images and you would need to sew four of each to make the star. Notice how the piecing order is reversed on the two components. This will make it so that your seams are opposing, making it less lumpy when you sew the components together. I did the same thing with my Marcelle block: every other foundation was pieced from the corner toward the center, and every other was pieced from the center out to the corner of the block. Clever, eh?
Remember when you are drafting your foundation pattern: start with the finished dimension of the pieces, draw in all the seams, then add the 1/4″ seam allowance all the way around (the dotted line).
Happy Piecing!!
Sharon


Very clever indeed to inverse the order.