What a fun week making Flying Geese blocks for the Super Simple Sampler! These six inch blocks have been a great way to practice my precision piecing…some of the pieces are so tiny. We are just past half-way through making the blocks. This is going to be a really fun sampler quilt! Here is how to make this block…
Cutting
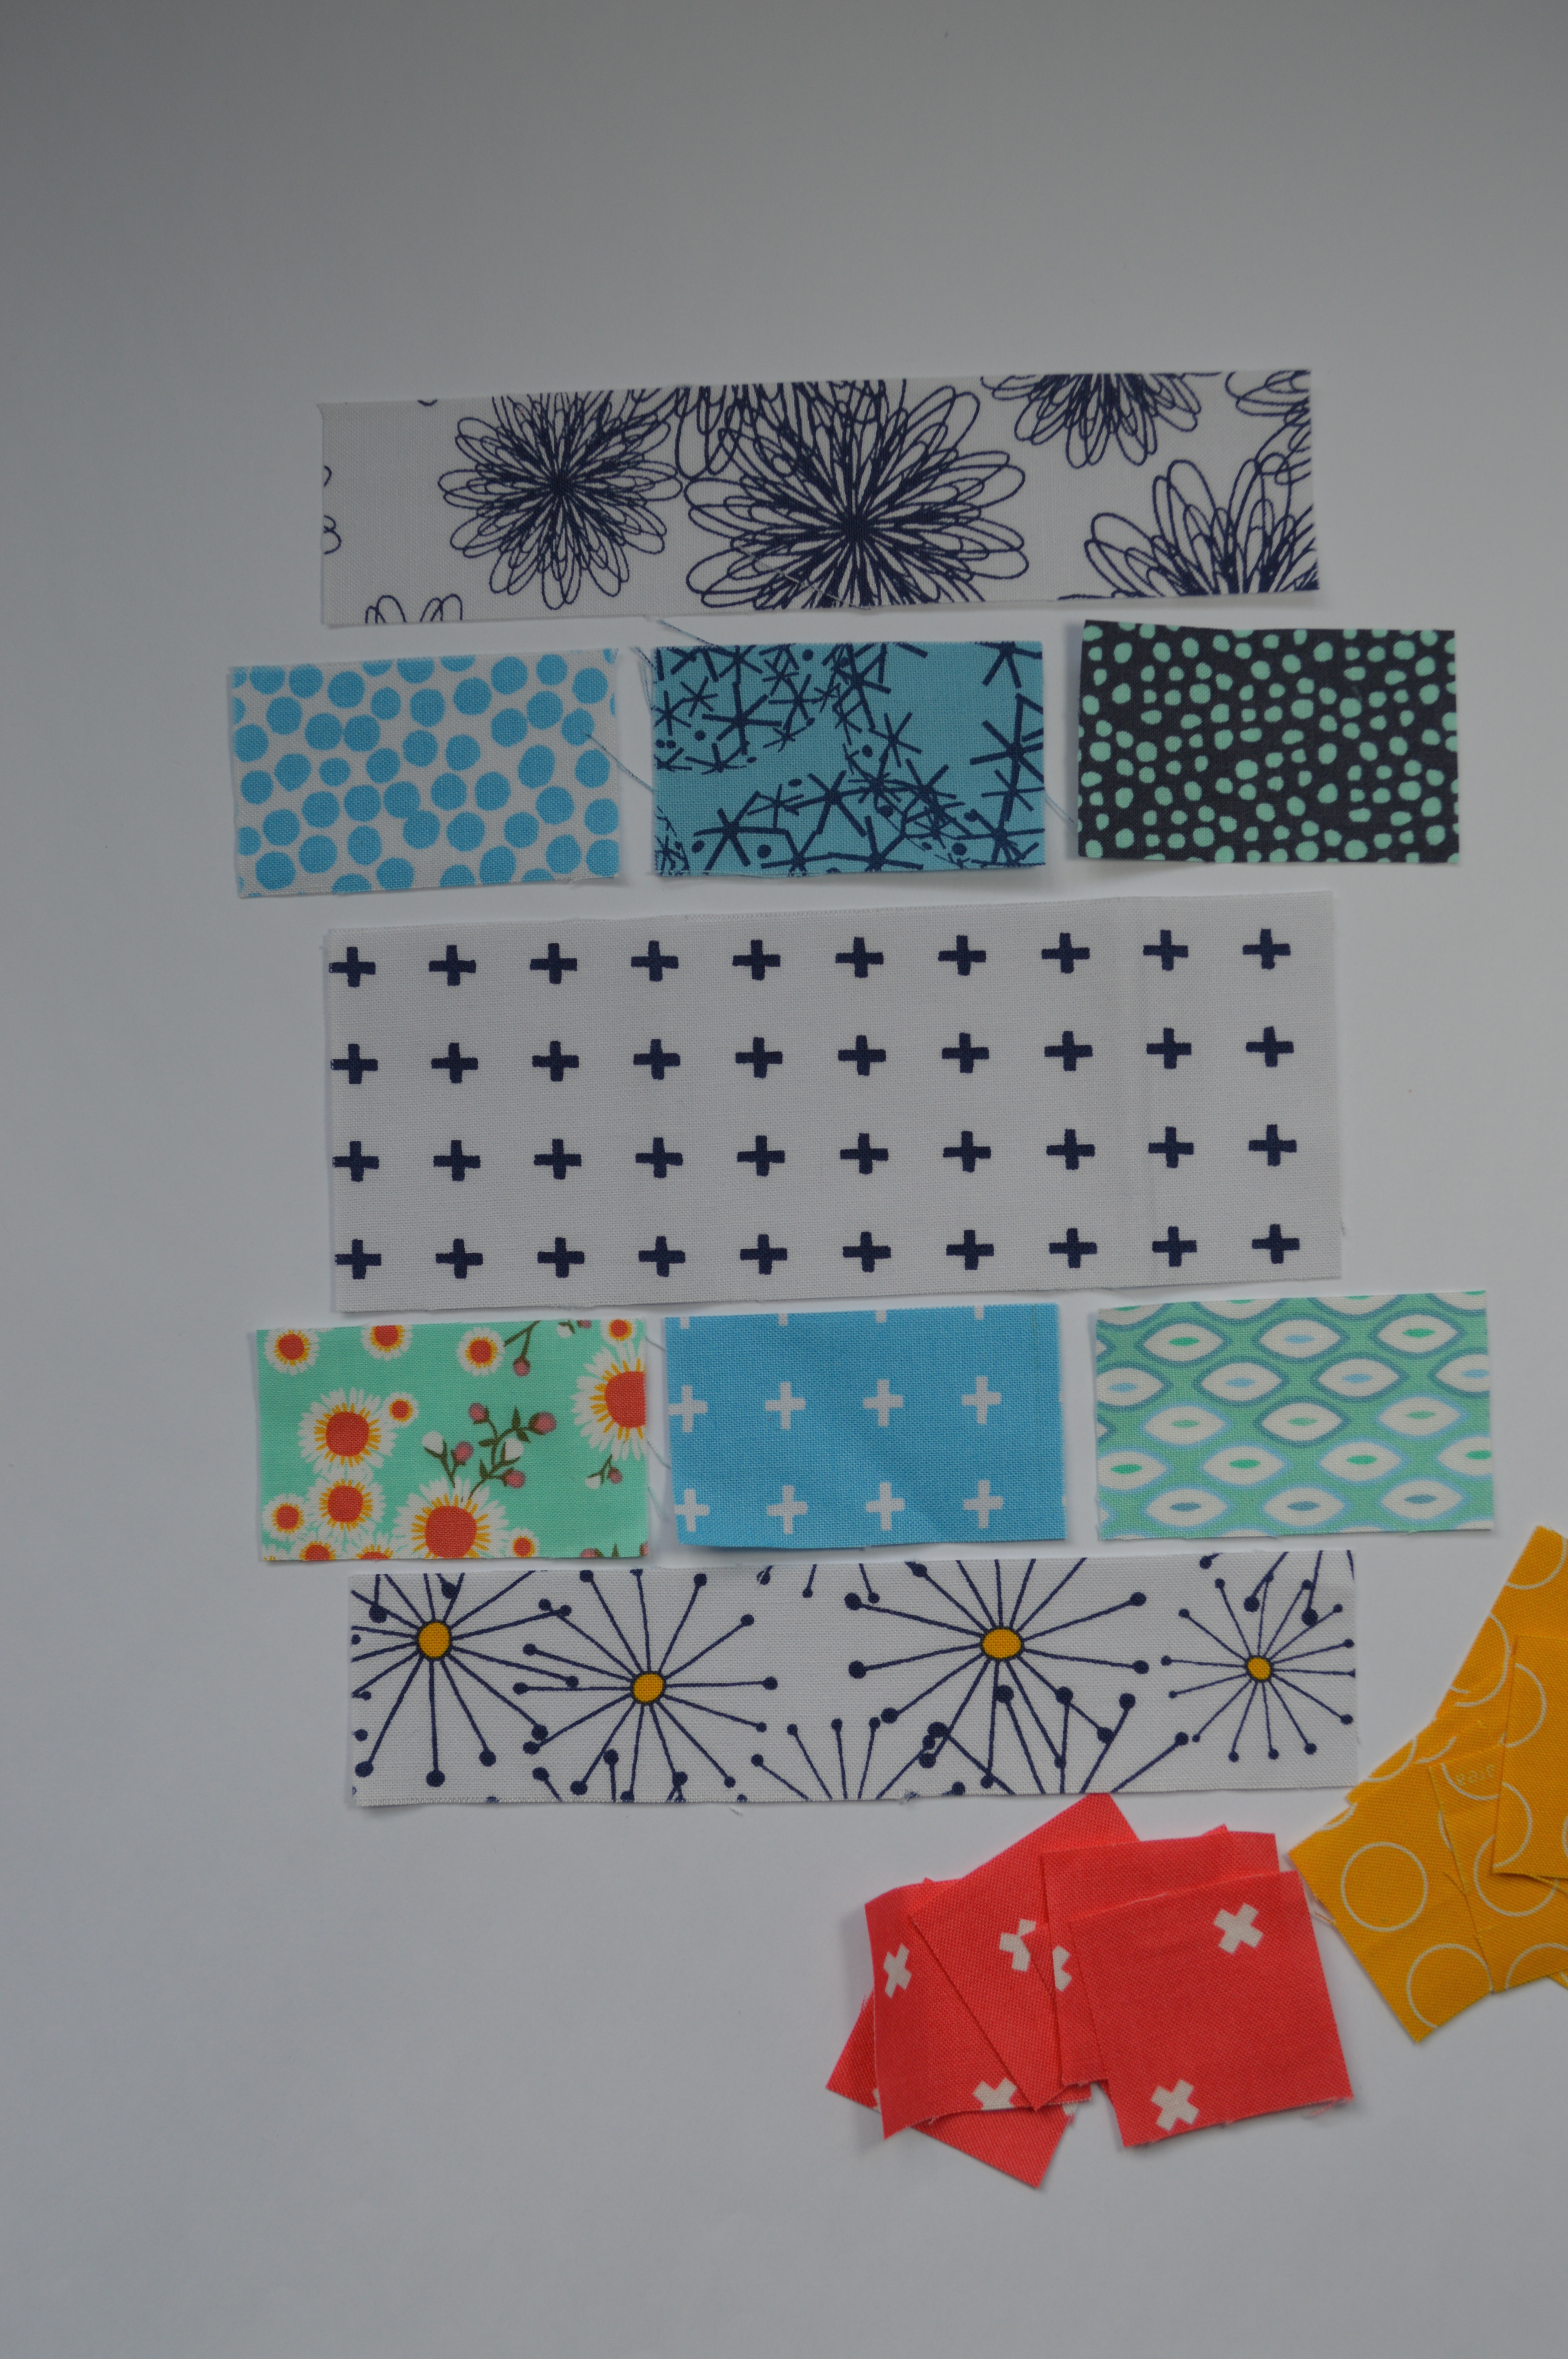
from the gray prints: cut (2) 6 1/2″ x 1 1/2″ strips; (1) 6 1/2″ x 2 1/2″ strip
from light blue prints: cut (6) 2 1/2″ x 1 1/2″ rectangles
from each, yellow and pink: cut (6) 1 1/2″ squares
Sewing
I showed tutorials on previous posts on sewing flying geese, Here and Here.
1. Place a yellow square, right sides facing, one light blue rectangle so that it lines up with one end of the rectangle.
2. Mark the diagonal through the yellow square by folding it in half and pinch to crease. Use the crease as a guide to sew the diagonal.
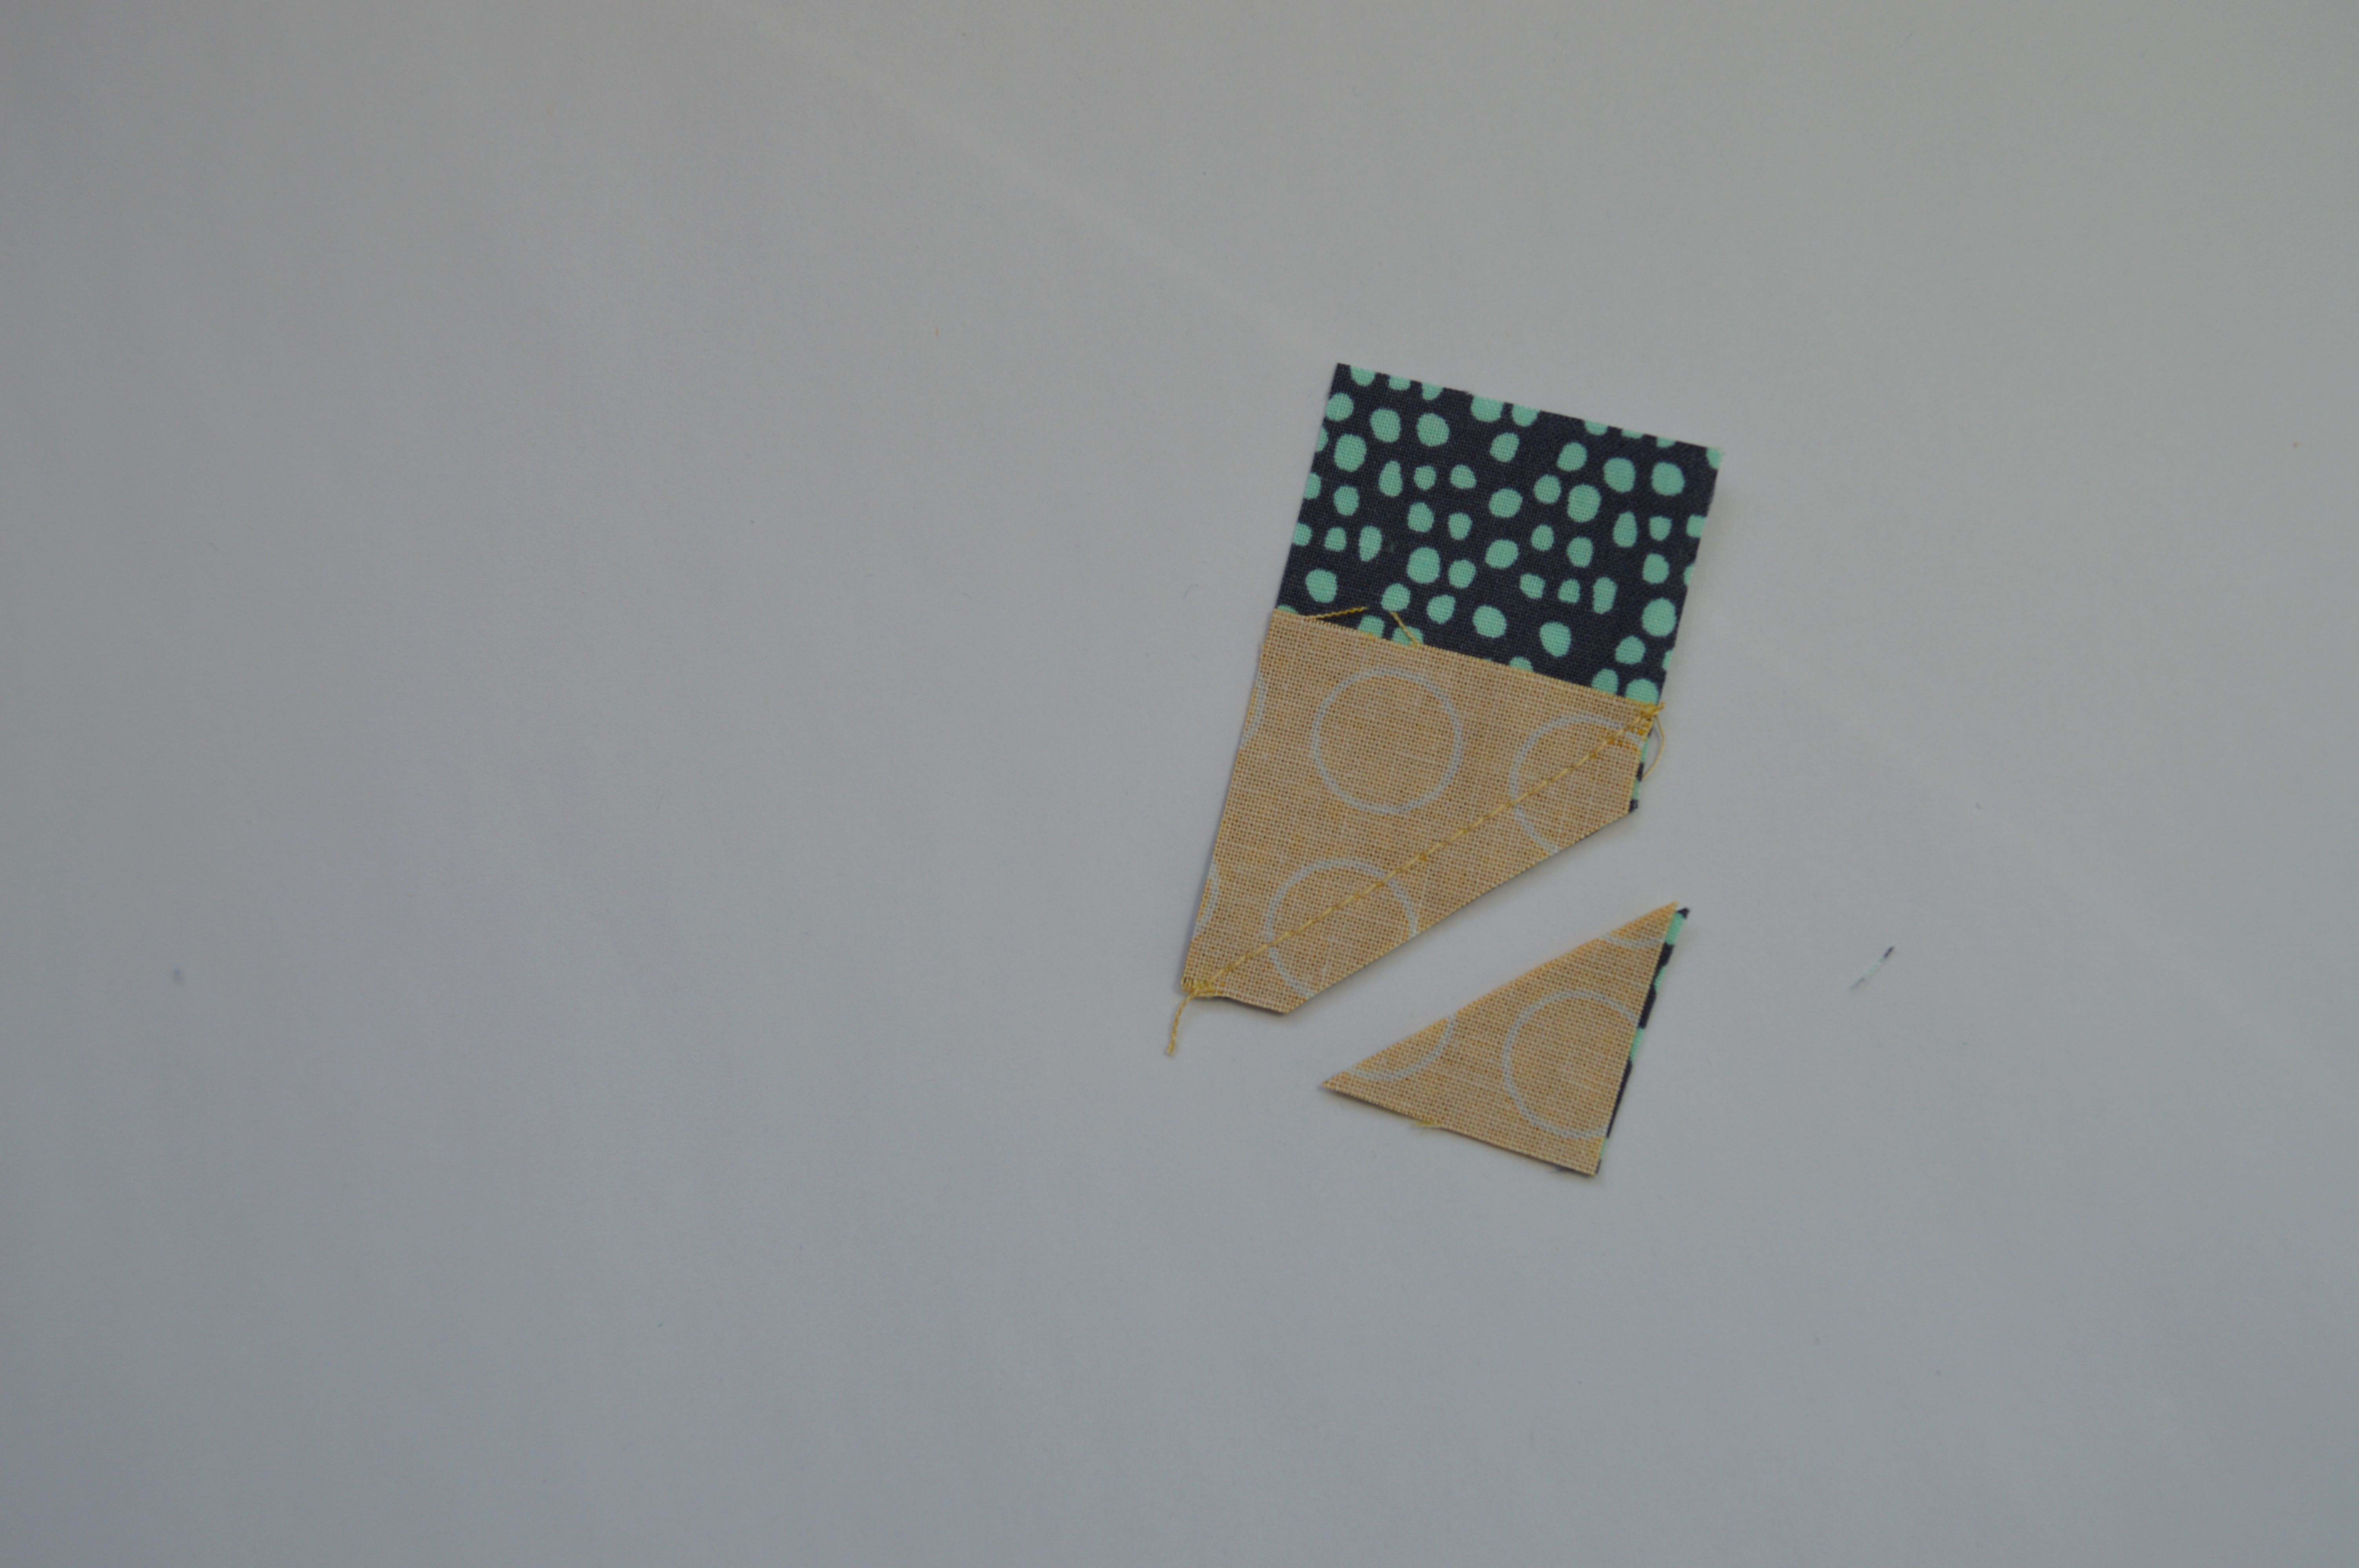
3. Trim the excess corner fabric 1/4″ from the seam as shown above. Open and press. Make three of these with yellow and three with pink (see below).
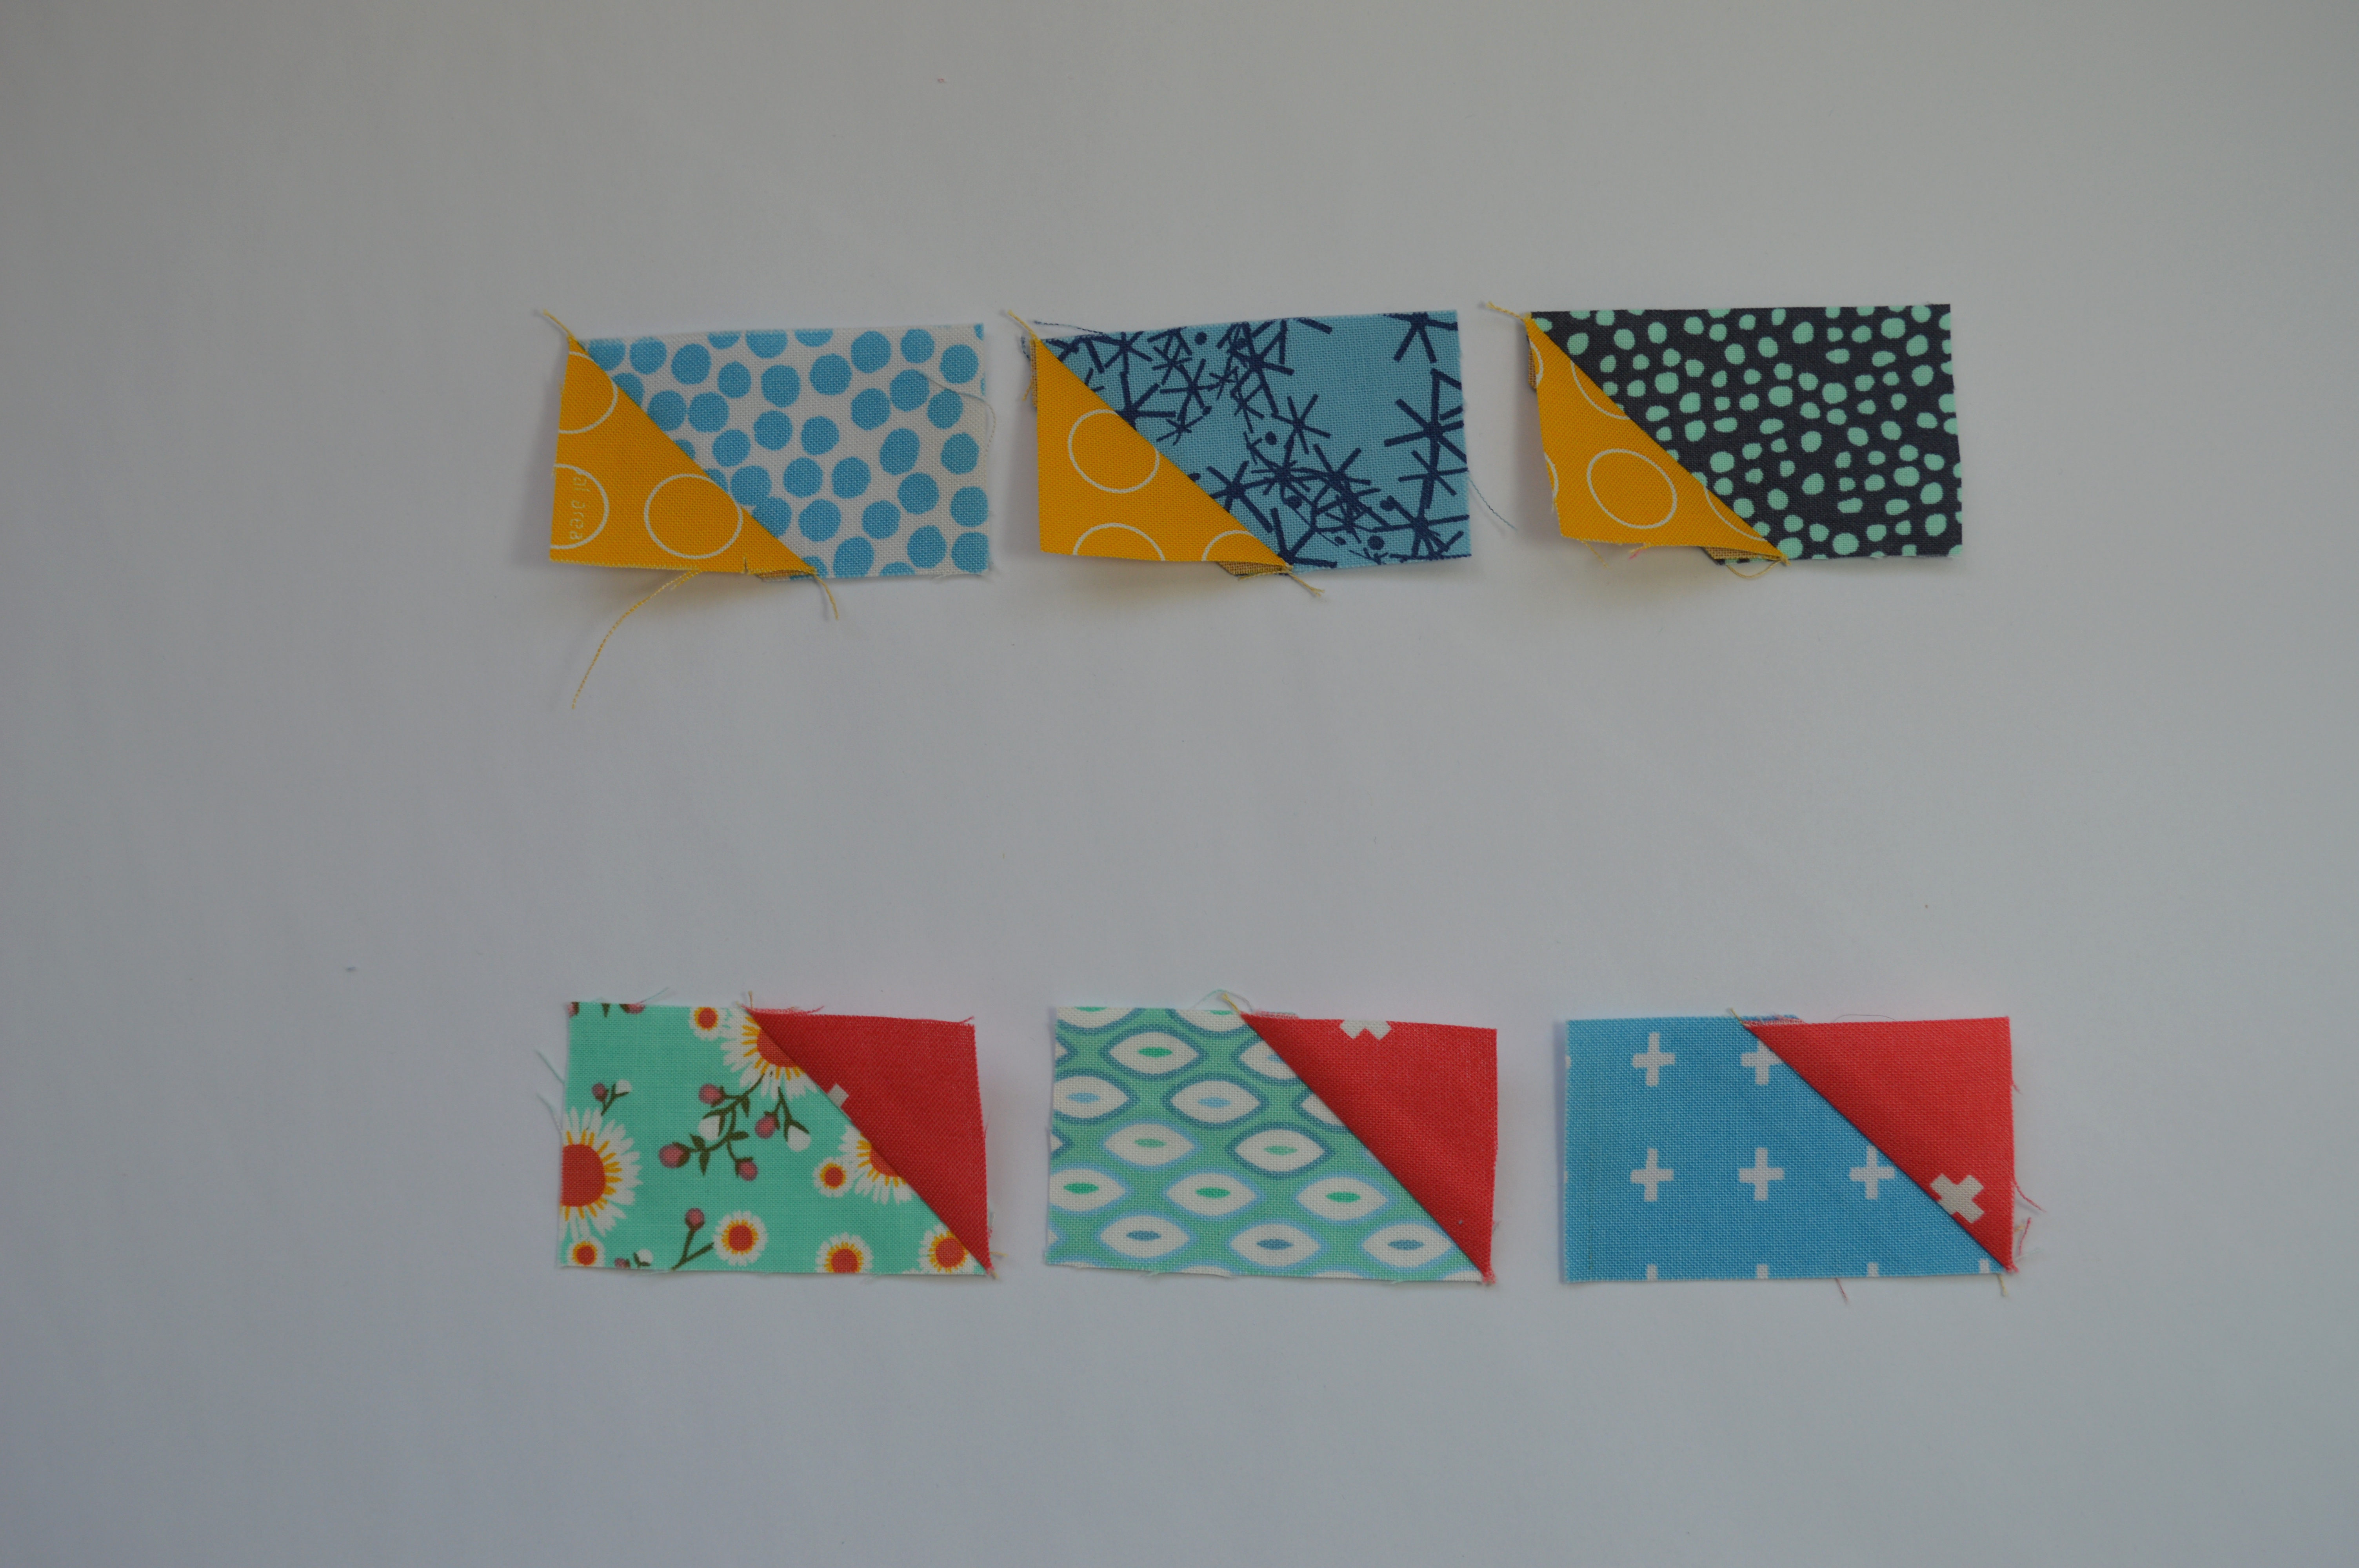
4. Follow the same steps to add a second pink or yellow square to the opposite side of each blue rectangle.
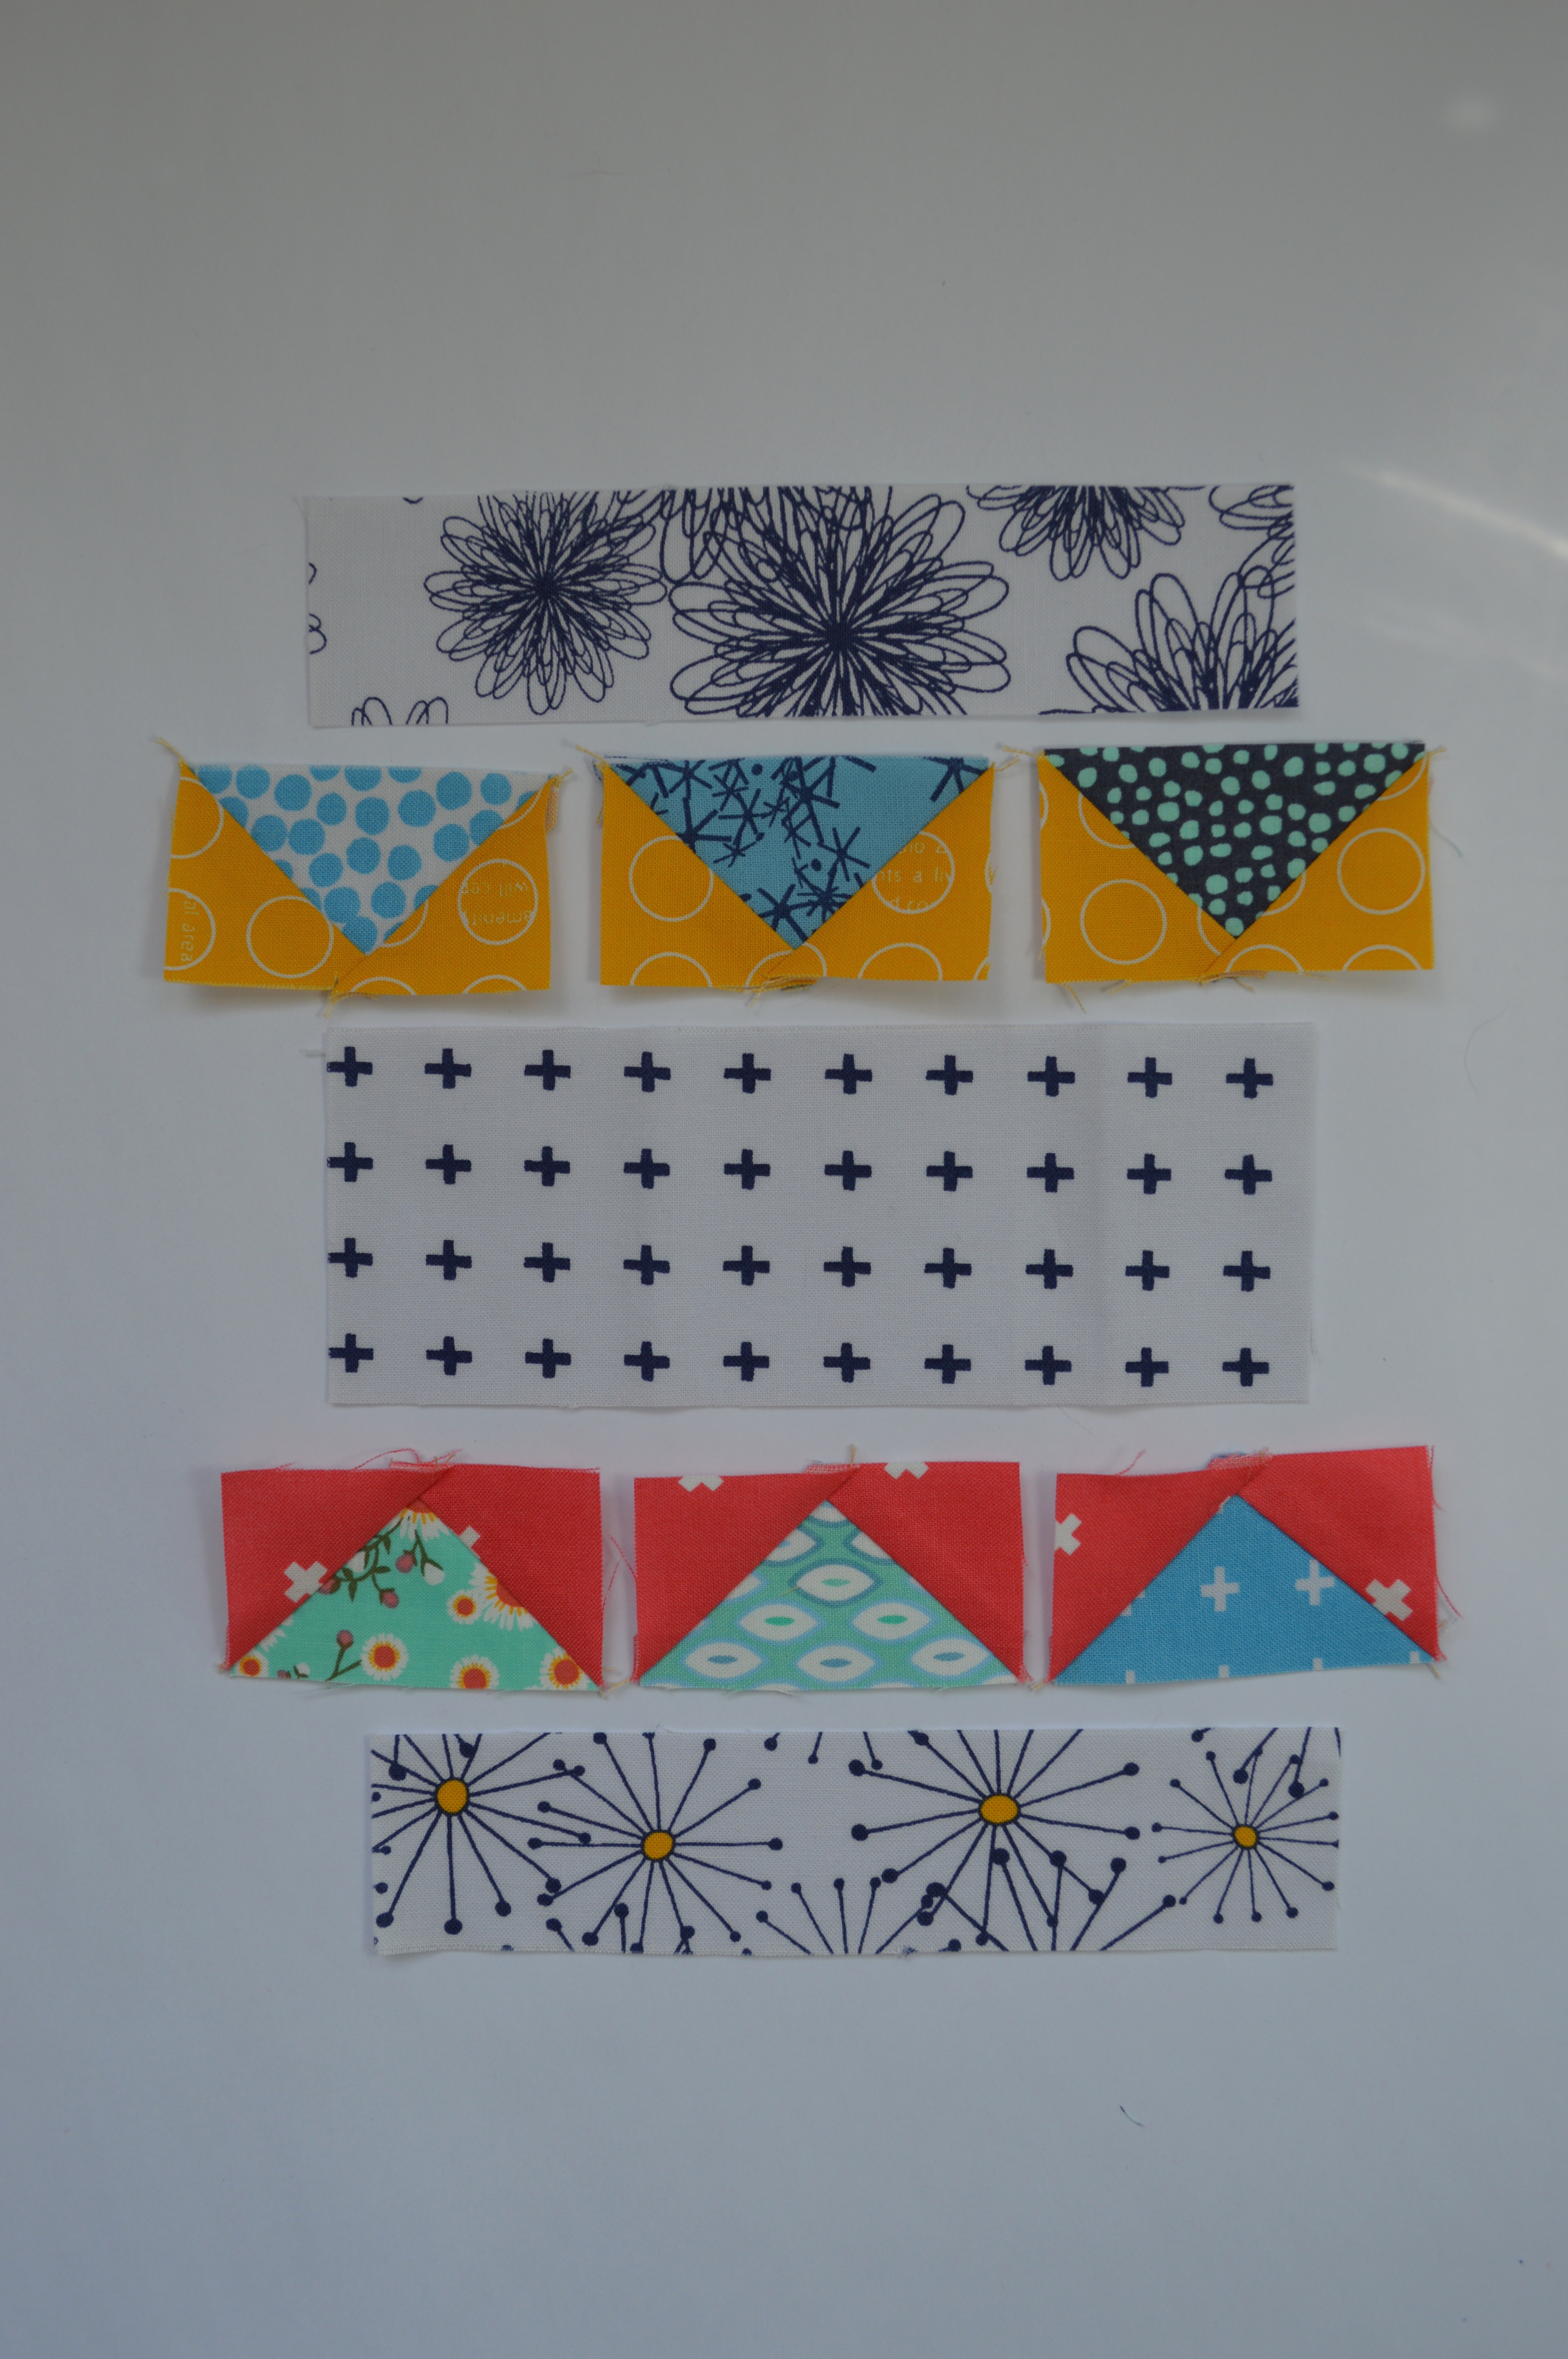
5. Arrange the pink and yellow flying geese units as shown above. Sew them together in rows, ensure the geese in each set are pointed the same direction. Press seams open.
6. Sew the pink flying geese set to a 6 1/2″ x 1 1/2″ gray print strip. The strip should be against the blue fabrics of the geese. Press toward the strip.
7. Sew the yellow flying geese set to a 6 1/2″ x 1 1/2″ gray print strip. The strip should be against the blue fabrics of the geese. See Below.
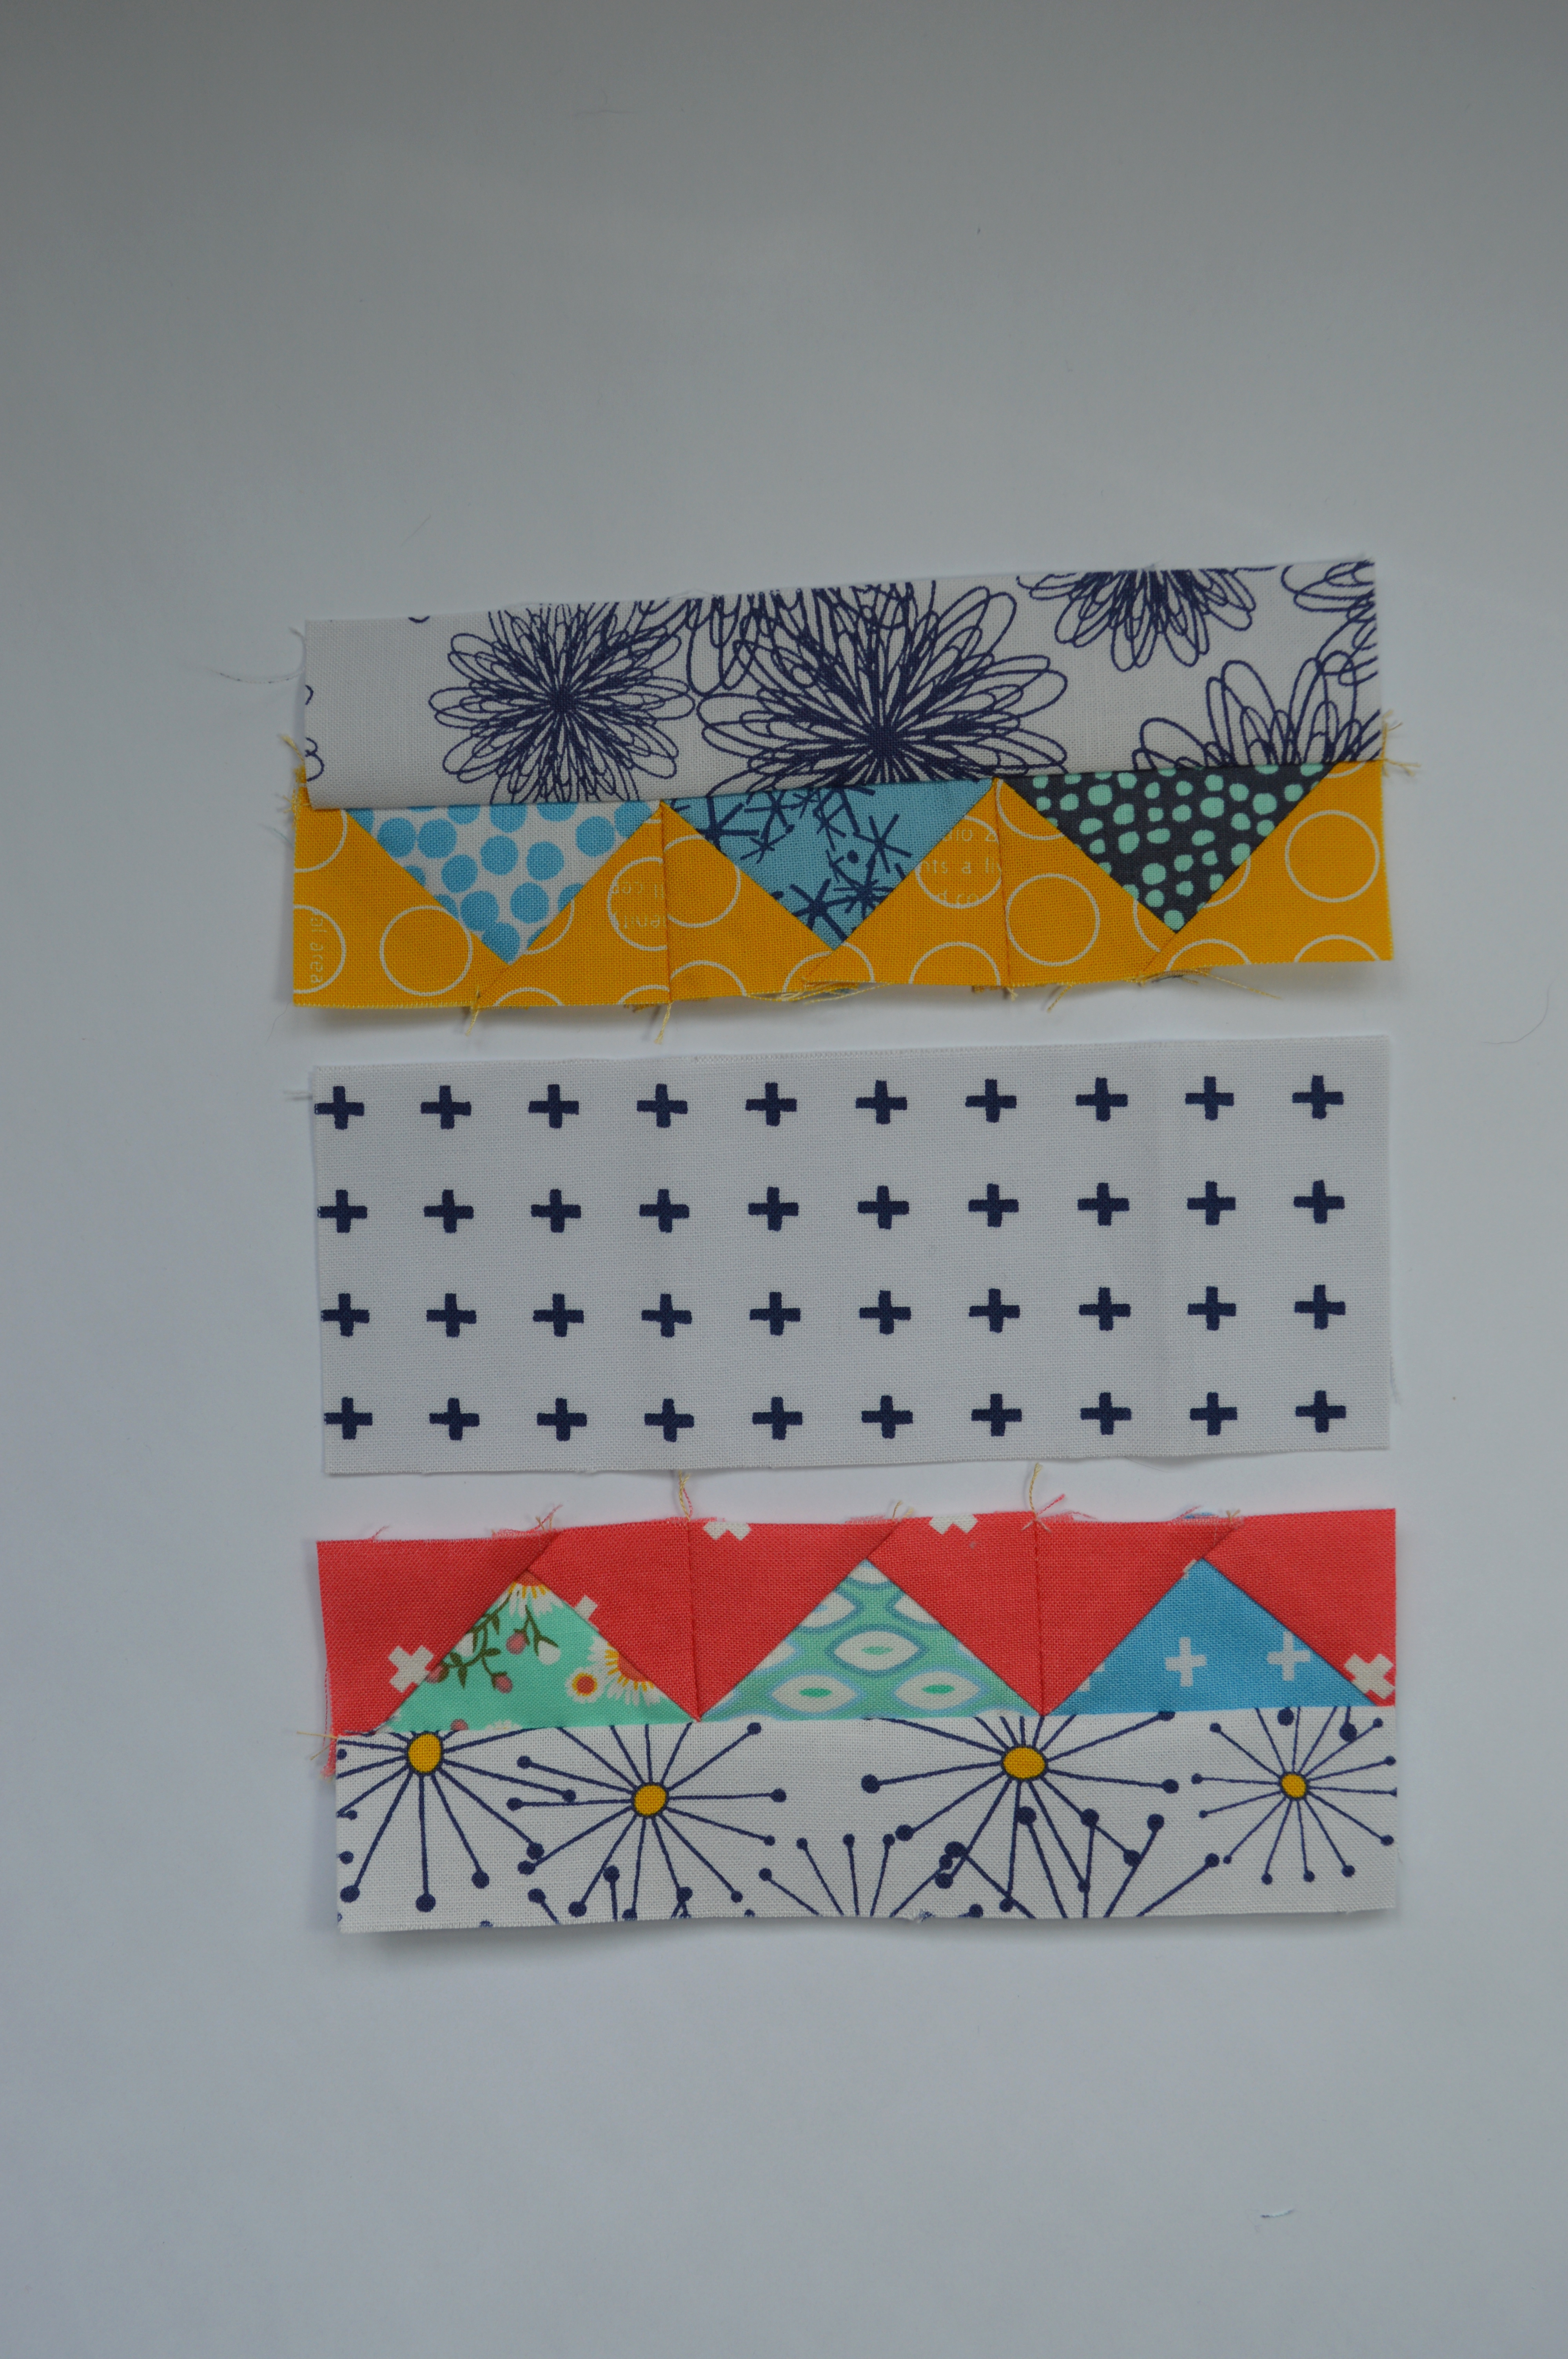
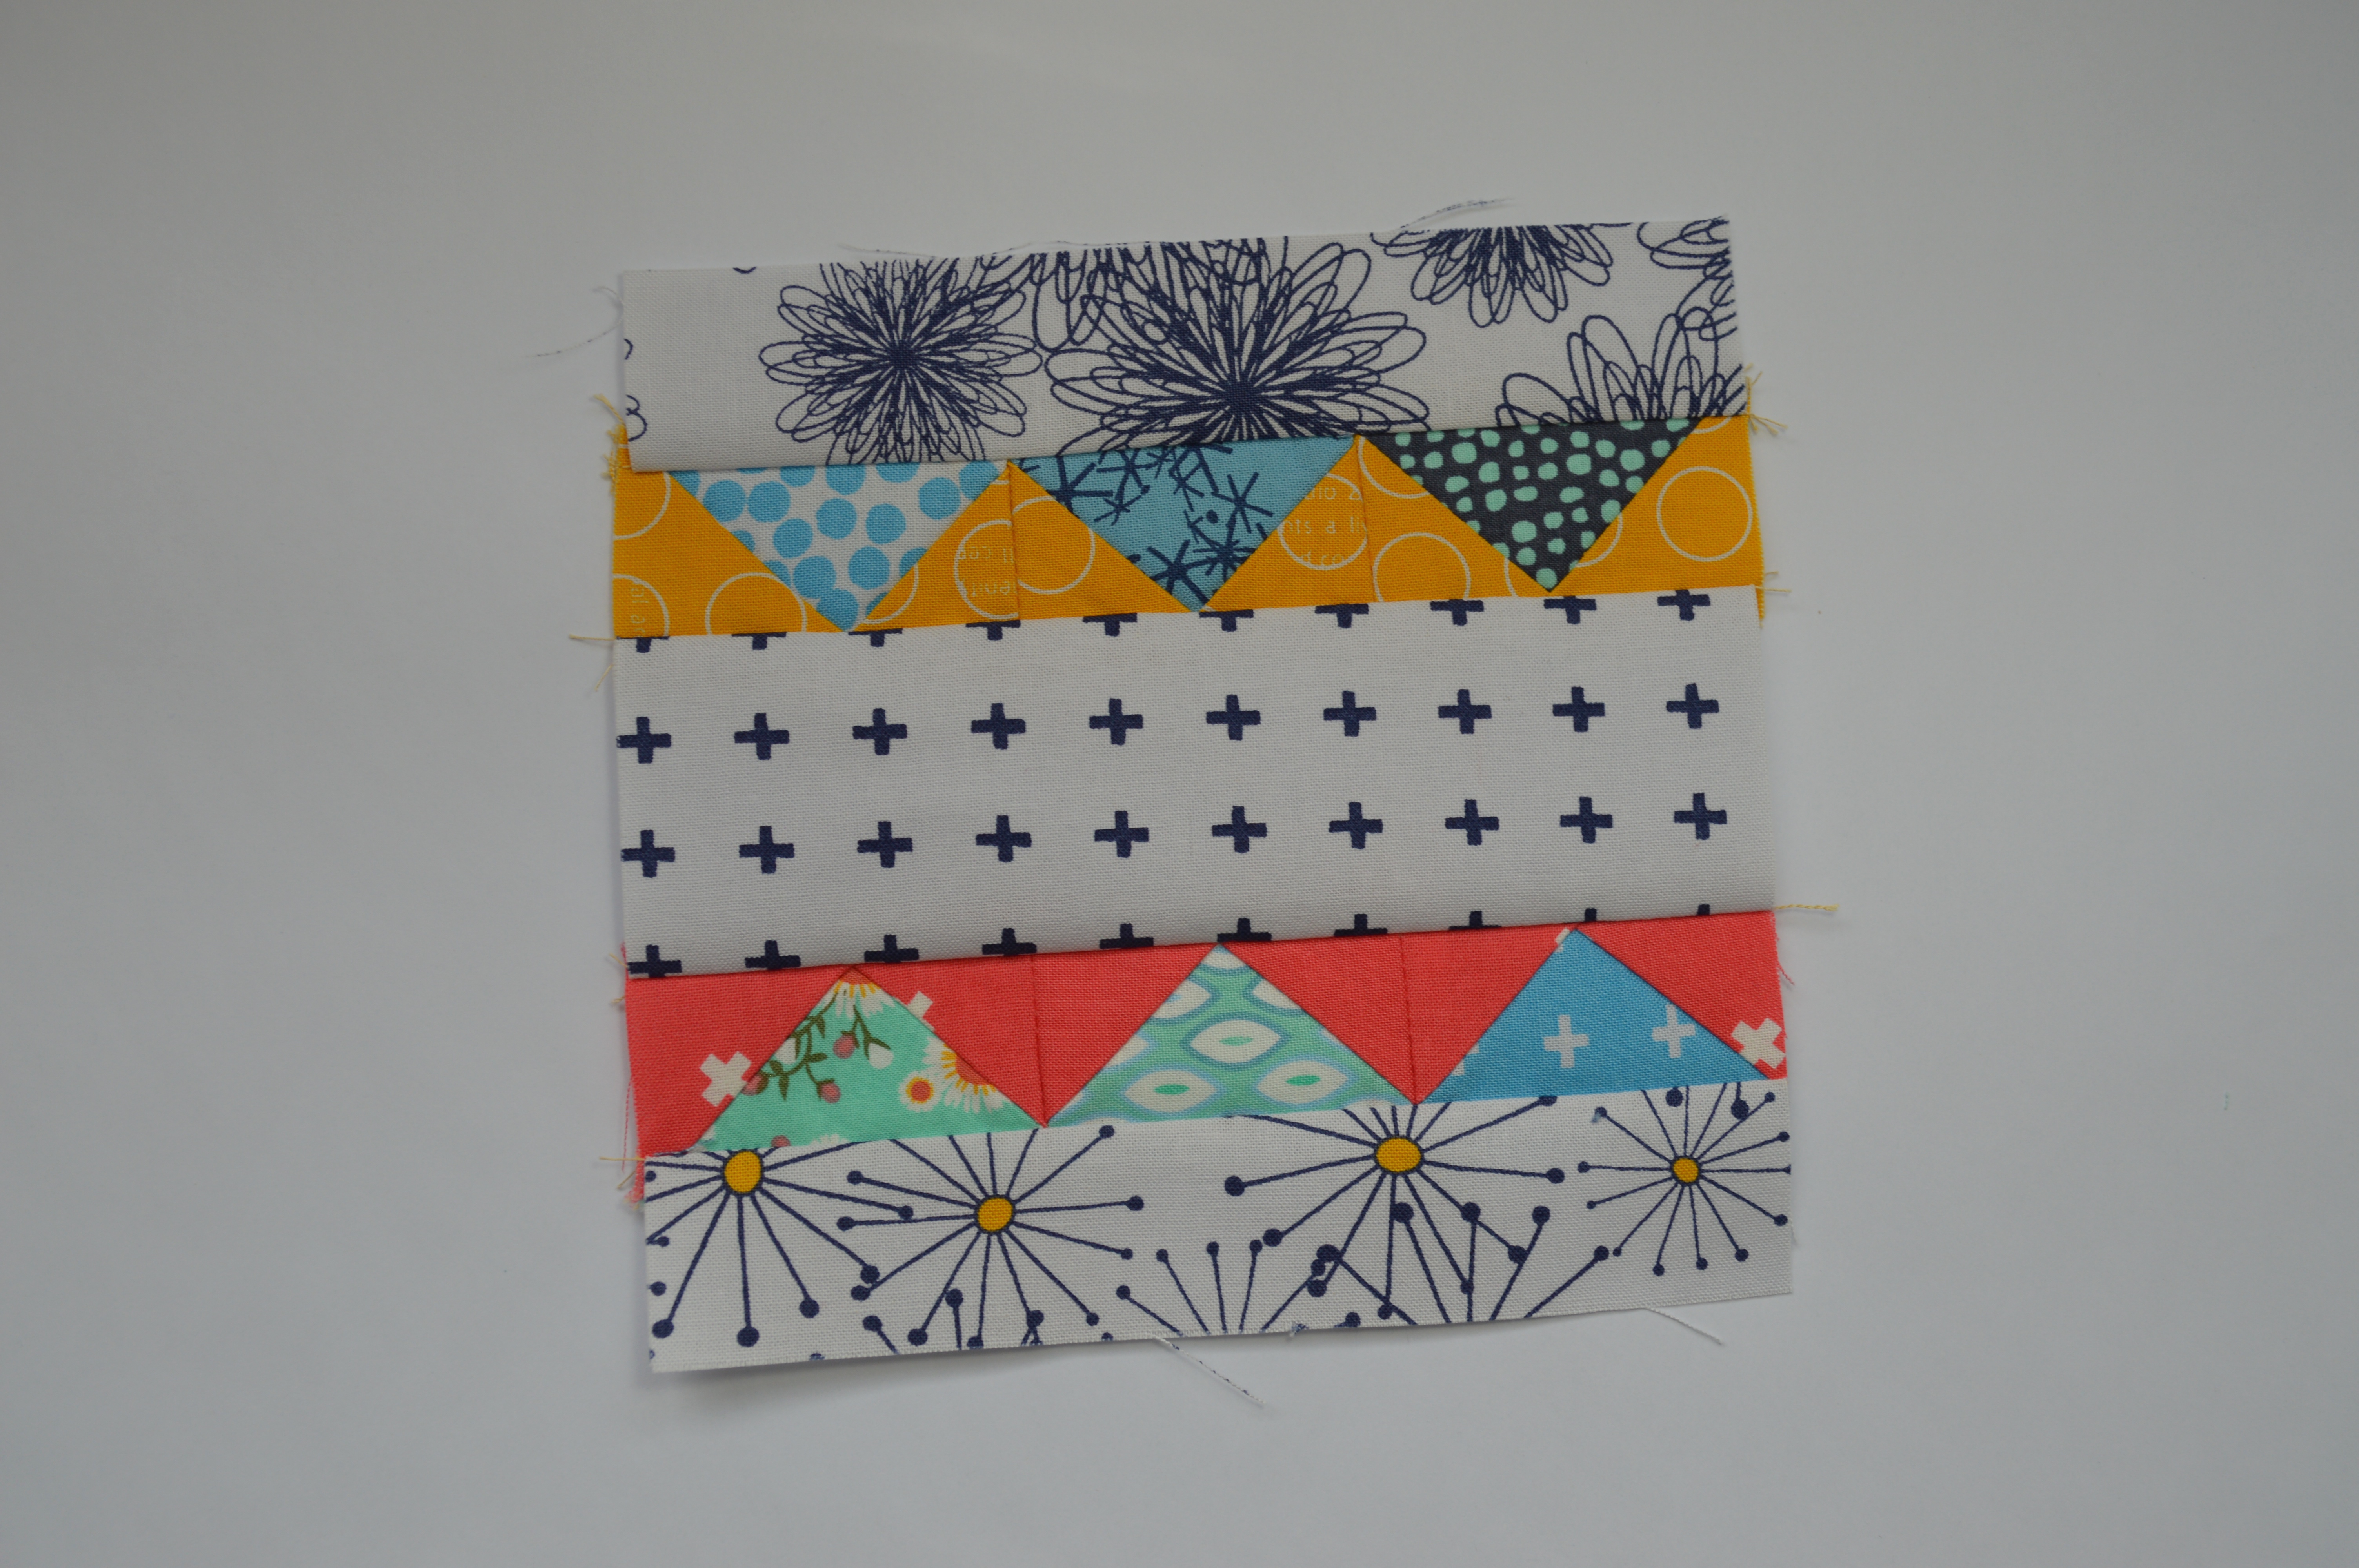
8. Sew the flying geese units to opposite sides of the 6 1/2″ x 2 1/2″ center strip. Press toward the center strip.
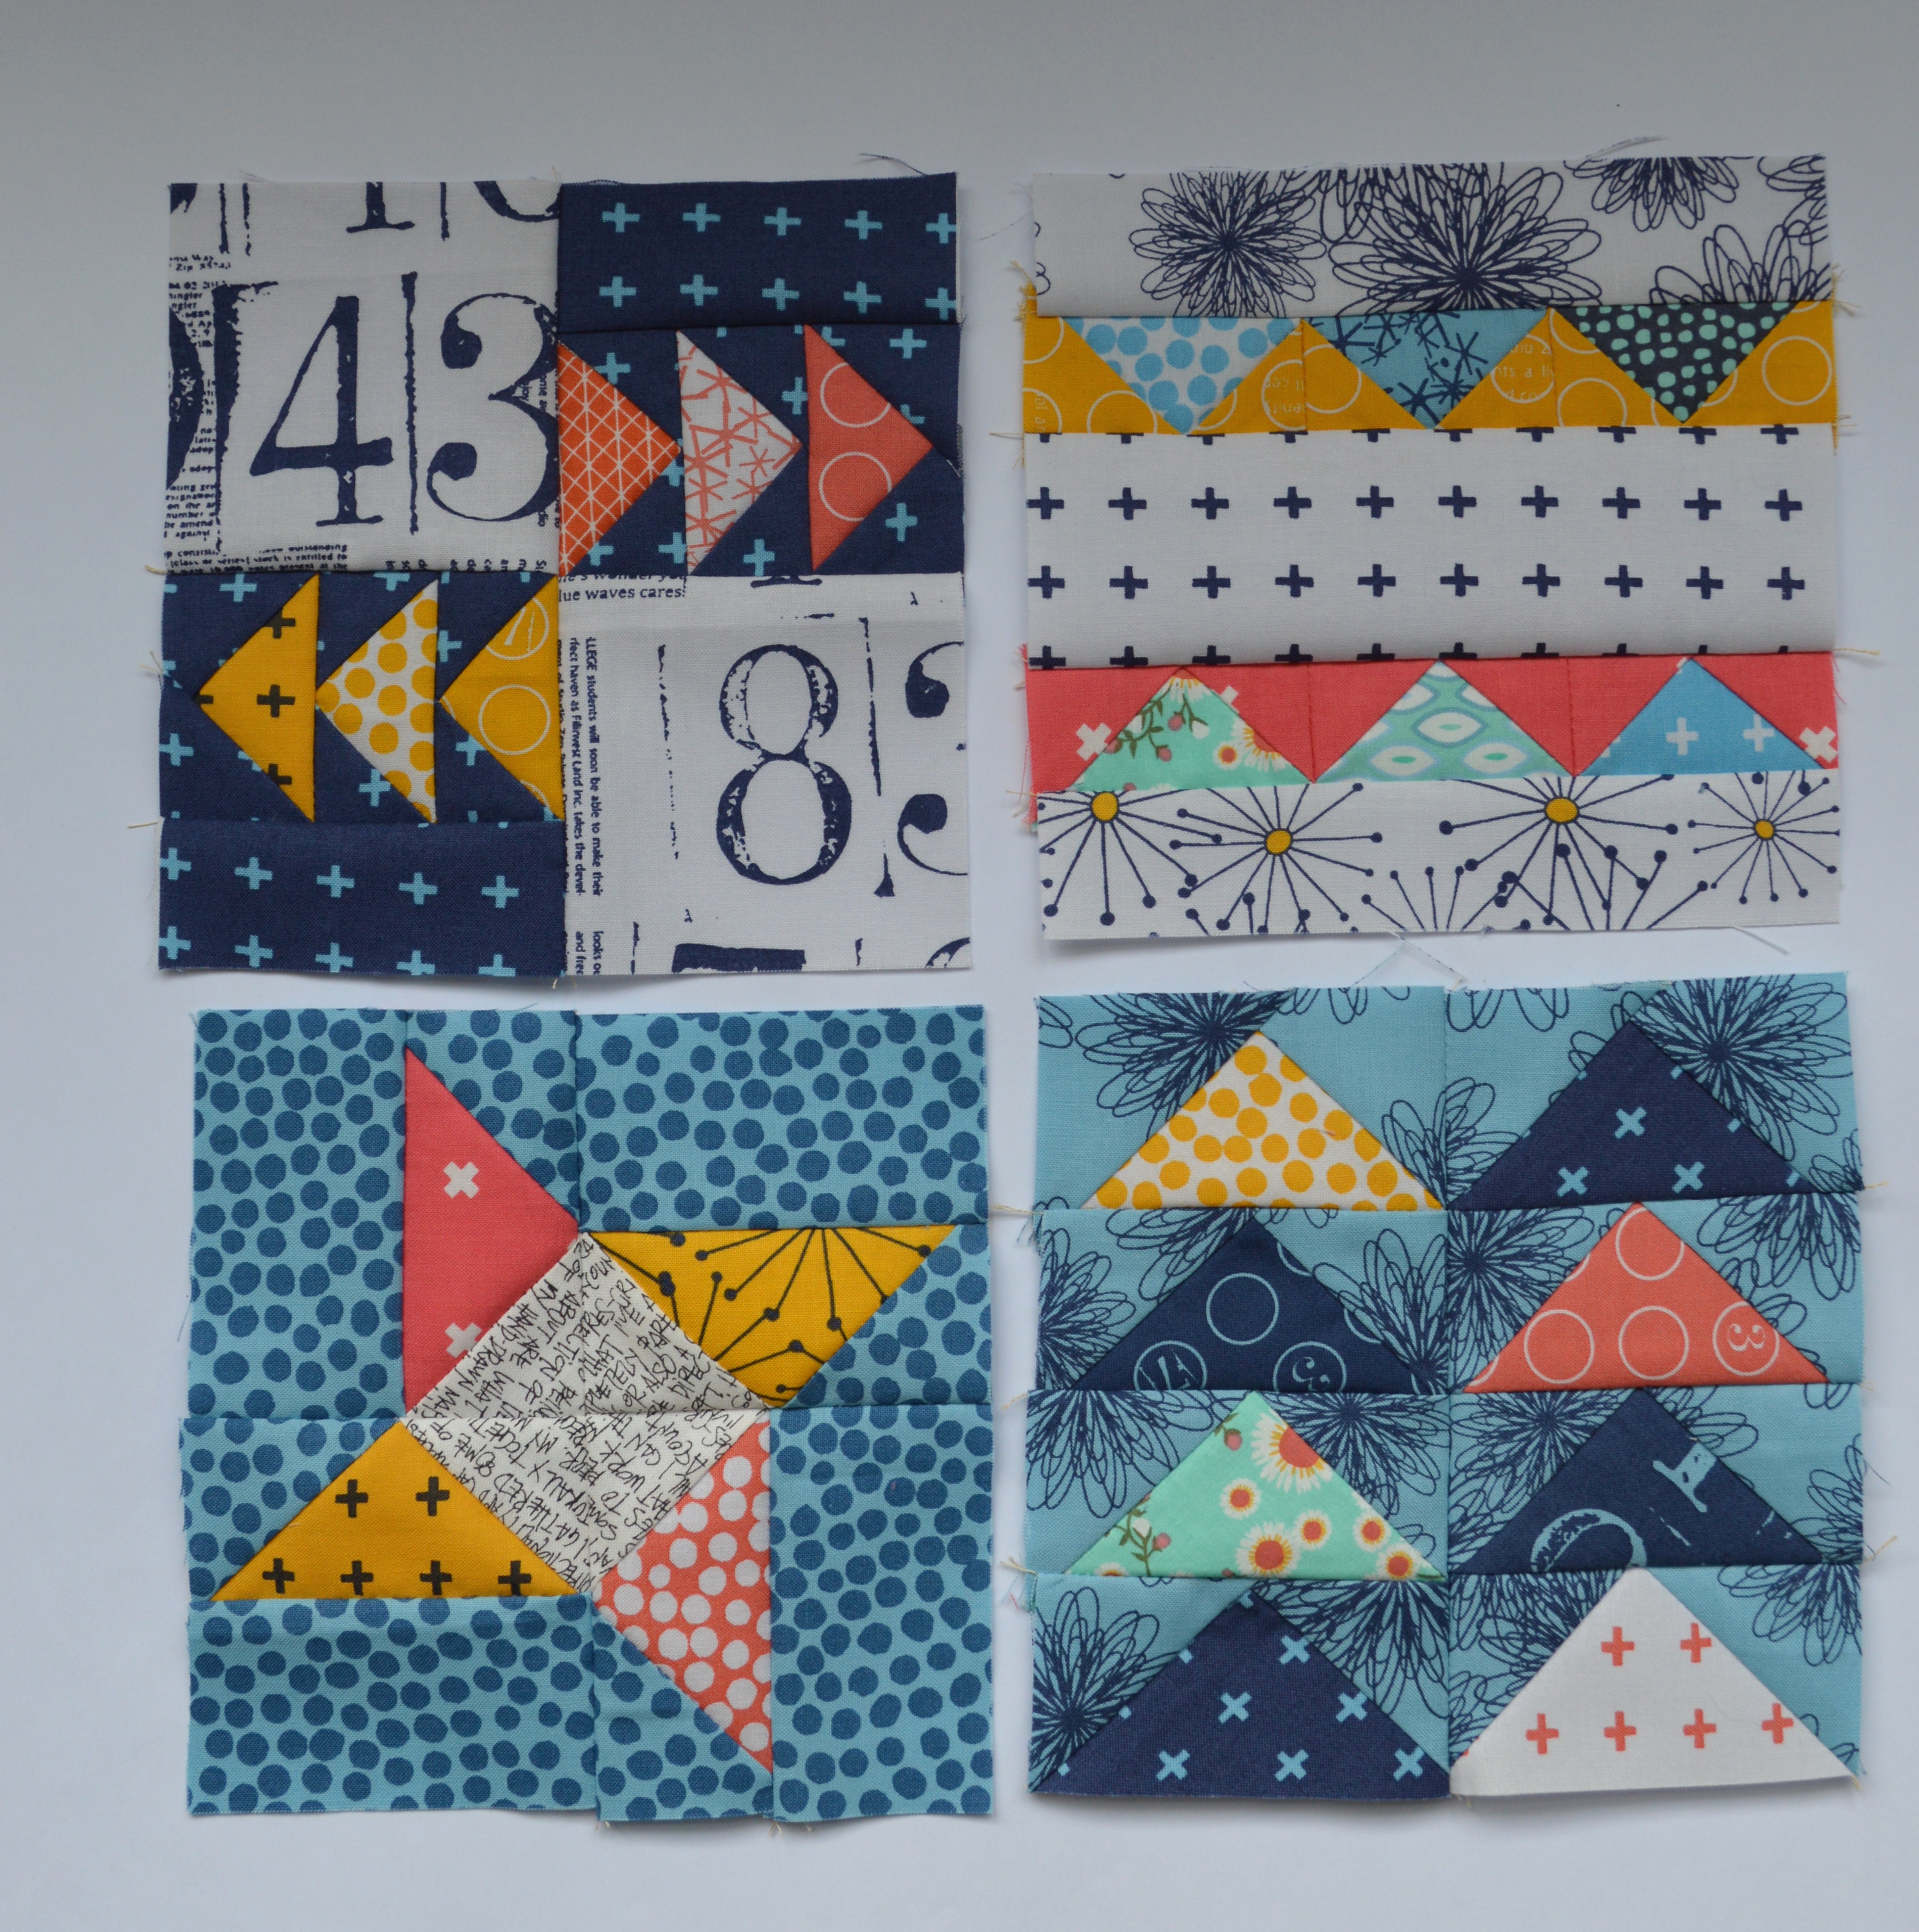
Flying Geese Sampler Blocks
That wraps up the January edition of our 6″ super simple sampler blocks. I think these flying geese blocks have been our most intensive ones yet, but they are cute! Thanks for following along.
Sharon


I Think sized small it would make a nice smashing treatment.
This maybe my favorite. Reminds me of a crown!