Welcome to the first official post of the Polka Dot Bikini Quilt Along. If you are just joining in, check out the QAL page for the nitty gritty details. If you want to purchase the pattern, Click Here, to download the pattern immediately and join the fun!
First order of business? the winner of the Pink Chalk fabrics $25 gift card is comment #40: Barb, congratulations!
Second? a fun surprise! Jeni at In Color Order has two copies of the Polka Dot Bikini pattern to give away to lucky readers. If you haven’t bought the pattern yet, go visit her today (even if you have it, her blog is tons of fun, so be sure and visit and say “hi”). Jeni is part of my memories of making this quilt. We met last year at the Pink Castle Camp Stitch-a-Lot and had a fantastic weekend! She and Brenda and the others cheered me on as I spent almost the entire weekend patiently sewing away on the Bikini top, and gave me tons of encouragement on creating a pattern for it.
Ok. Back to our topic: getting started.
Let’s start with the not-as-fun-but-really-important stuff:
Preparing Templates:
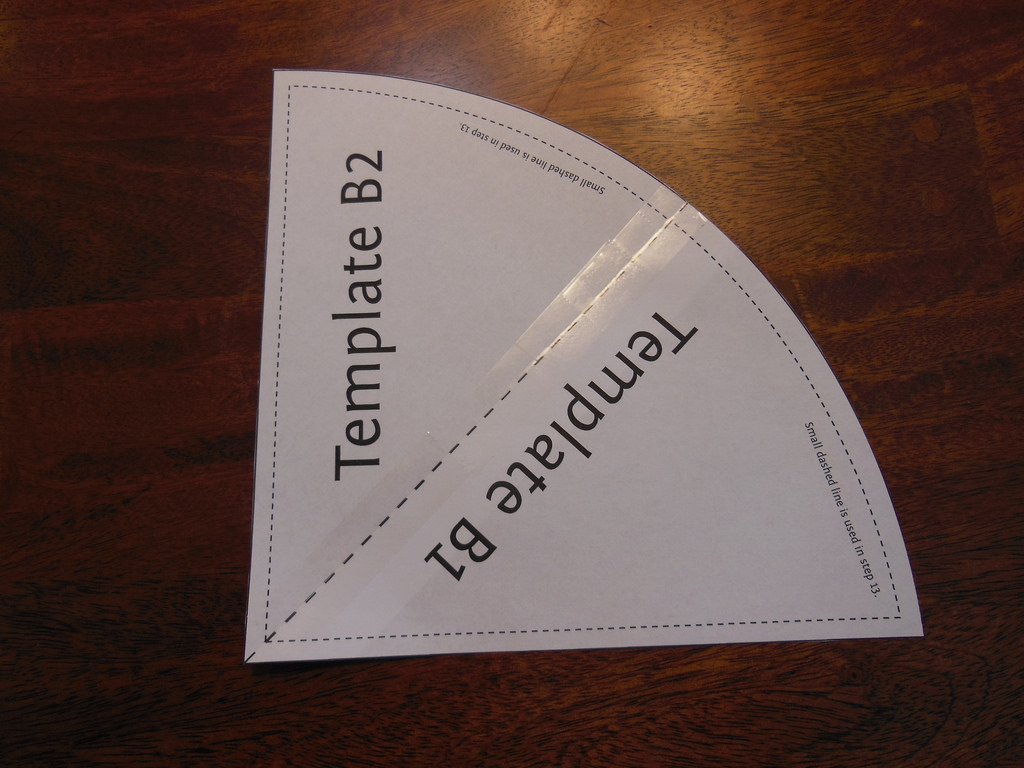
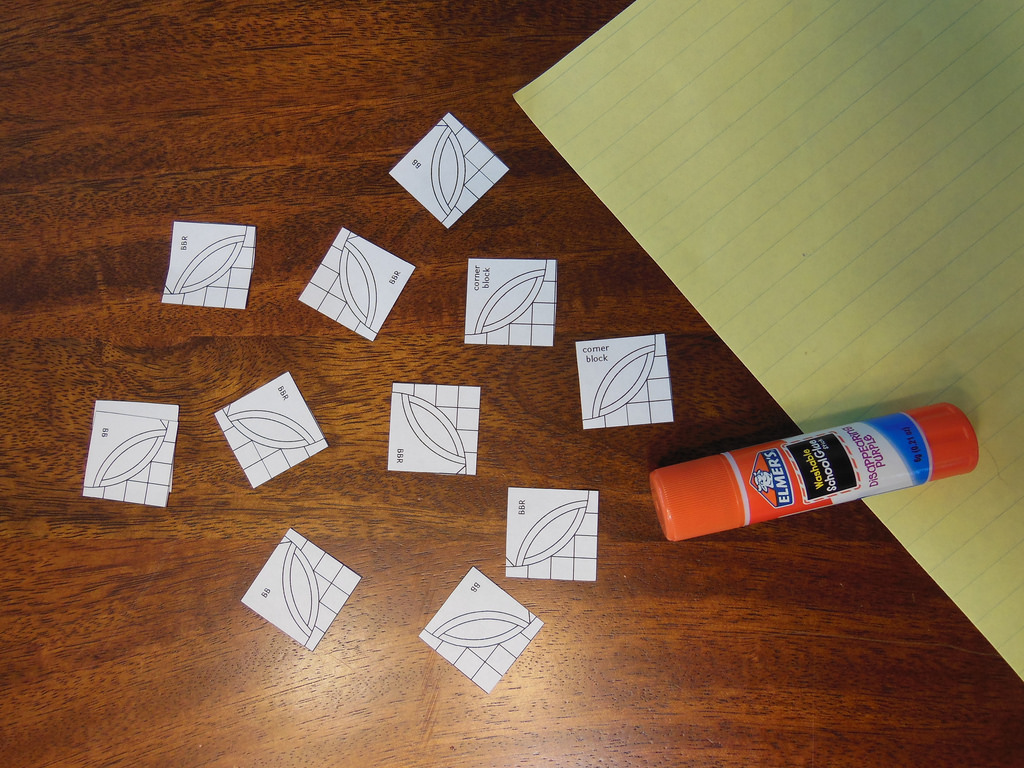
*your ability to piece this quilt depends on the accuracy of your templates. Make sure you print them at 100% and that your printer is not set to “resize” to fit within a certain margin.
*before you start cutting fabric, check your templates for accuracy: the straight sides of the A template should measure 9 1/2″
*cut out the A and B templates and then join the two halves like I did in the photo above for template B. If you don’t have card stock to print them on, just print on paper and then glue them to some cardboard or template plastic and cut them out again. (the cardboard backing on a Layer Cake is perfect for this!)
Cutting Fabric:
*I do NOT recommend cutting all your fabric at the start. Cut the pieces to make one or two blocks, sew them up and get familiar with the instructions and make sure all your measurements are right before you cut up all your fabric.
*Each block requires one gray square, one piece cut from the P template (I used a print) and two pieces cut from the A template (I used solids).
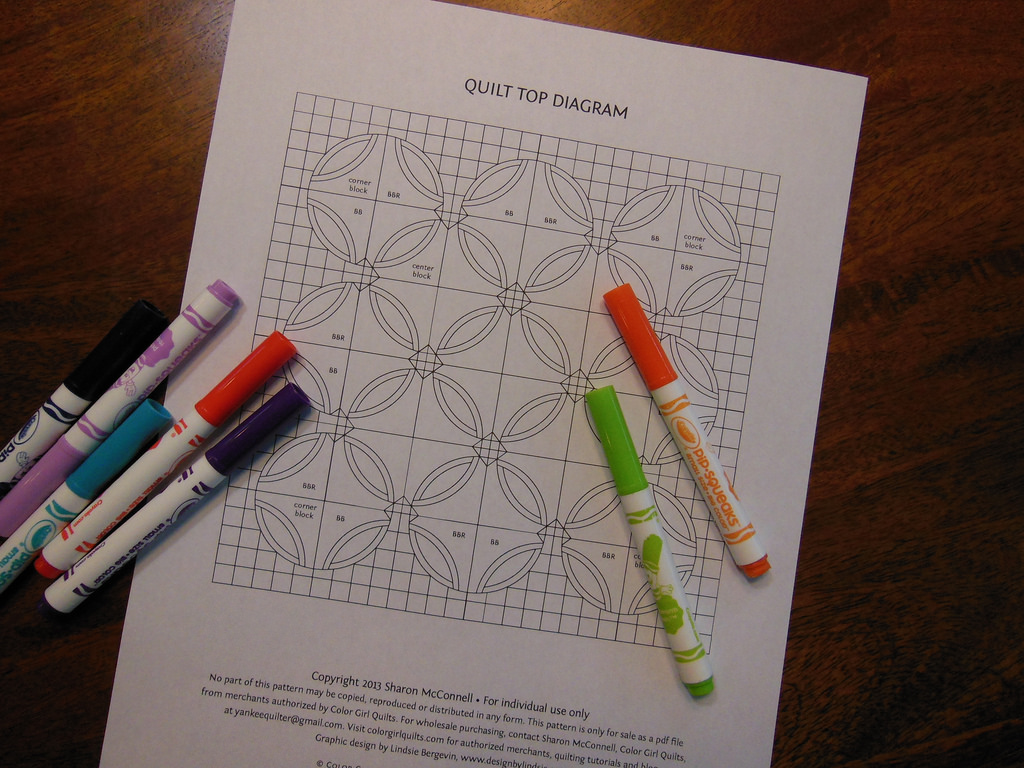
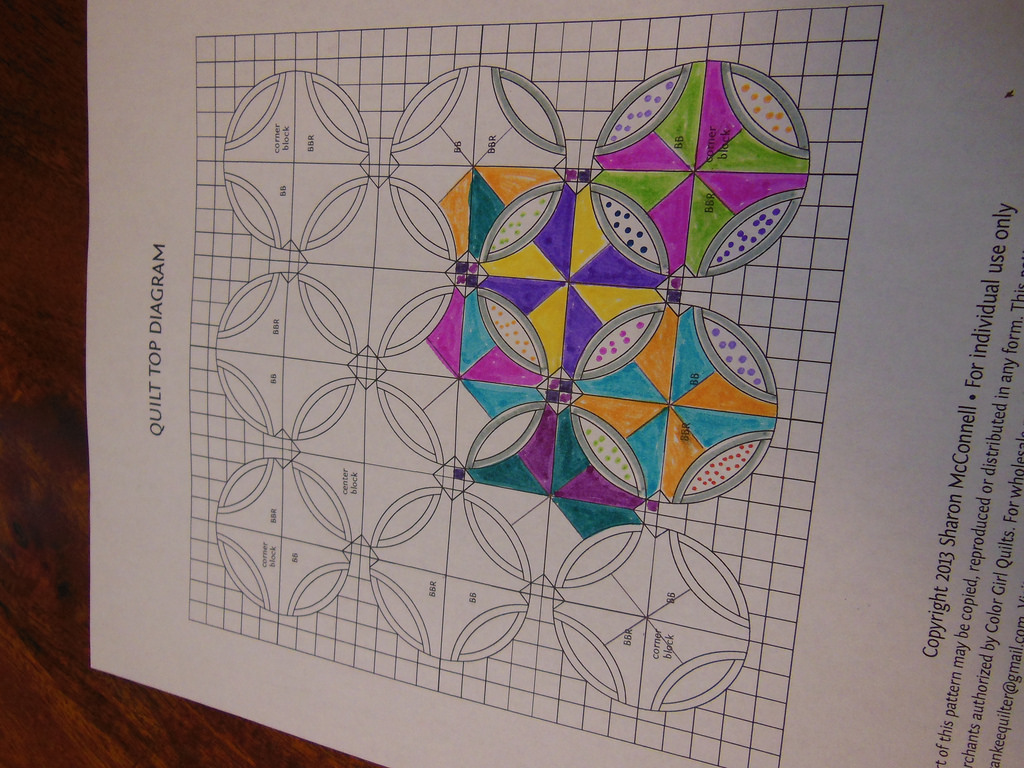
*get out your markers or crayons and color your quilt diagram before you cut the fabric. This way you have a plan for color placement and know what to cut from each fabric (particularly helpful for the A template pieces).
Piecing:
*see the Curved Piecing Tutorial. There are some trouble-shooting tips there, too. It takes practice…don’t give up if your curves aren’t perfect on the first block!
*steps 13 and 14 might be a bit tricky, there is a more detailed explanation (with photos).
*be really careful about pressing. Since your curved edges are bias, they are very prone to stretching or getting distorted. Minimize handling, stretching, and pressing fabrics after they are cut. When you press your seams, just hold the iron down, don’t rub the pieces with the iron.
Our first goal is to sew six center blocks (the ones with solid A fabrics on both sides of the pod shape) by February 6, when we will link up to share our start.
 |
| wow! this is fun. |
to make a design like I did above, use template A in its original two pieces to cut the solids. Cut them out of the paper, but don’t join the two halves before cutting the solids. Add a 1/4″ seam allowance to the dotted line side (the center of the “L” shape) and cut fabric with that, then sew two of those together to form the full “L” template shape. Finally, join the two halves to make your template so you can use it for the other cuts you need it for.
re-arrange the blocks? endless possibilities here, too. Stay tuned!
so color, gather your fabric, cut and start sewing!
Questions are welcomed! I am happy to help if I can.
Sharon


This comment has been removed by the author.
Heading up to the sewing room on a blustery winter day, to pick out my colors and start on the templates. Can’t wait!!
After the block is pieced, what measurement should it square up to?
I have not even thought about fabric yet I was just so excited I had the pattern. I guess I better get to planning.
OK….HELP!!! I’m having trouble at step #13. I couldn’t figure it out and I tried to ‘fudge’ it…but no go. What size is the final block?? and should I make another template B…cutting it at the smaller size (on the dotted line)?
I had the same problem.
thanks for the heads-up, ladies! square up the block to 8 1/2″ once you have sew the two gray arcs to the pod shape. Then use the template B to cut your arcs. **Sharon
This is a specific show that I watch and listen to. The host, Andrew Warner, interviews successful entrepreneurs, mostly from Pakistani Dramas the online startup world. If that’s a topic that interests you, the interviews are excellent and there are transcripts available with each show.
http://dramapk.net/
I thought this started last week hahahaha! Im 2 years LATE!! Still doing it tho. Its gorgeous. Thank you for leaving it up for us slow pokes 🙂 Amie